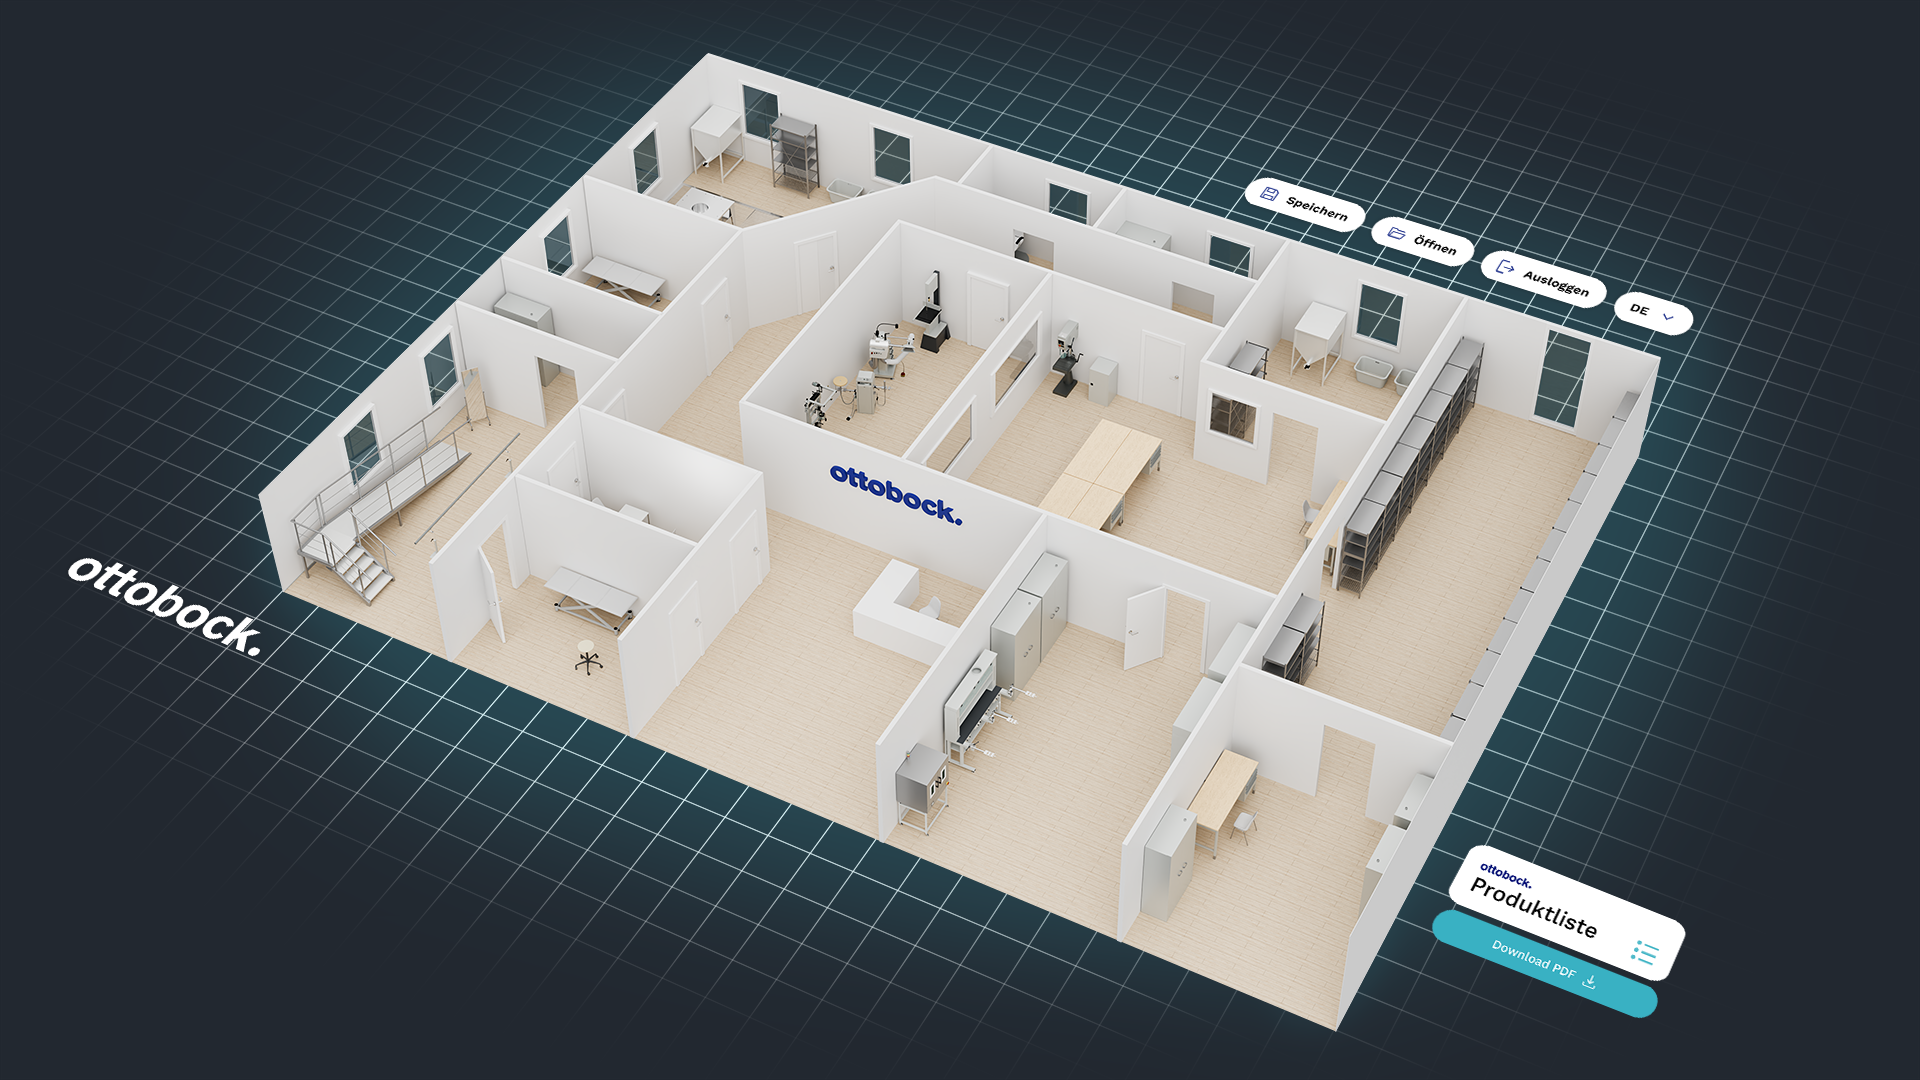
3D workshop planner
Founded in 1919, the family-owned company Ottobock, headquartered in Duderstadt, has been developing pioneering products in the fields of prosthetics, orthotics, wheelchairs, and exoskeletons for over 100 years. As a technology and global market leader, Ottobock consistently breaks new ground and even offers the planning and realization of specialized orthopedic and orthopedic shoemaking workshops. To optimally support this area, redPlant Realtime Studios developed the Ottobock 3D Planner – an intuitive and efficient tool for designing and equipping orthopedic workshops.

Enhancing quality of life
through holistic solutions
Guided by this principle, Ottobock develops a wide range of innovative products and solutions. The Ottobock 3D Planner can now also be counted among these innovations, serving as a powerful tool for planning and furnishing orthopedic workshops. It supports Ottobock employees in setting up workshops with machines and furnishings that meet the latest technical standards while taking occupational safety, health protection, and ergonomic considerations into account. Whether designing individual rooms or entire workshops, the planning process is now more intuitive, customized, and time-efficient than ever before.
Define the floor plan ...
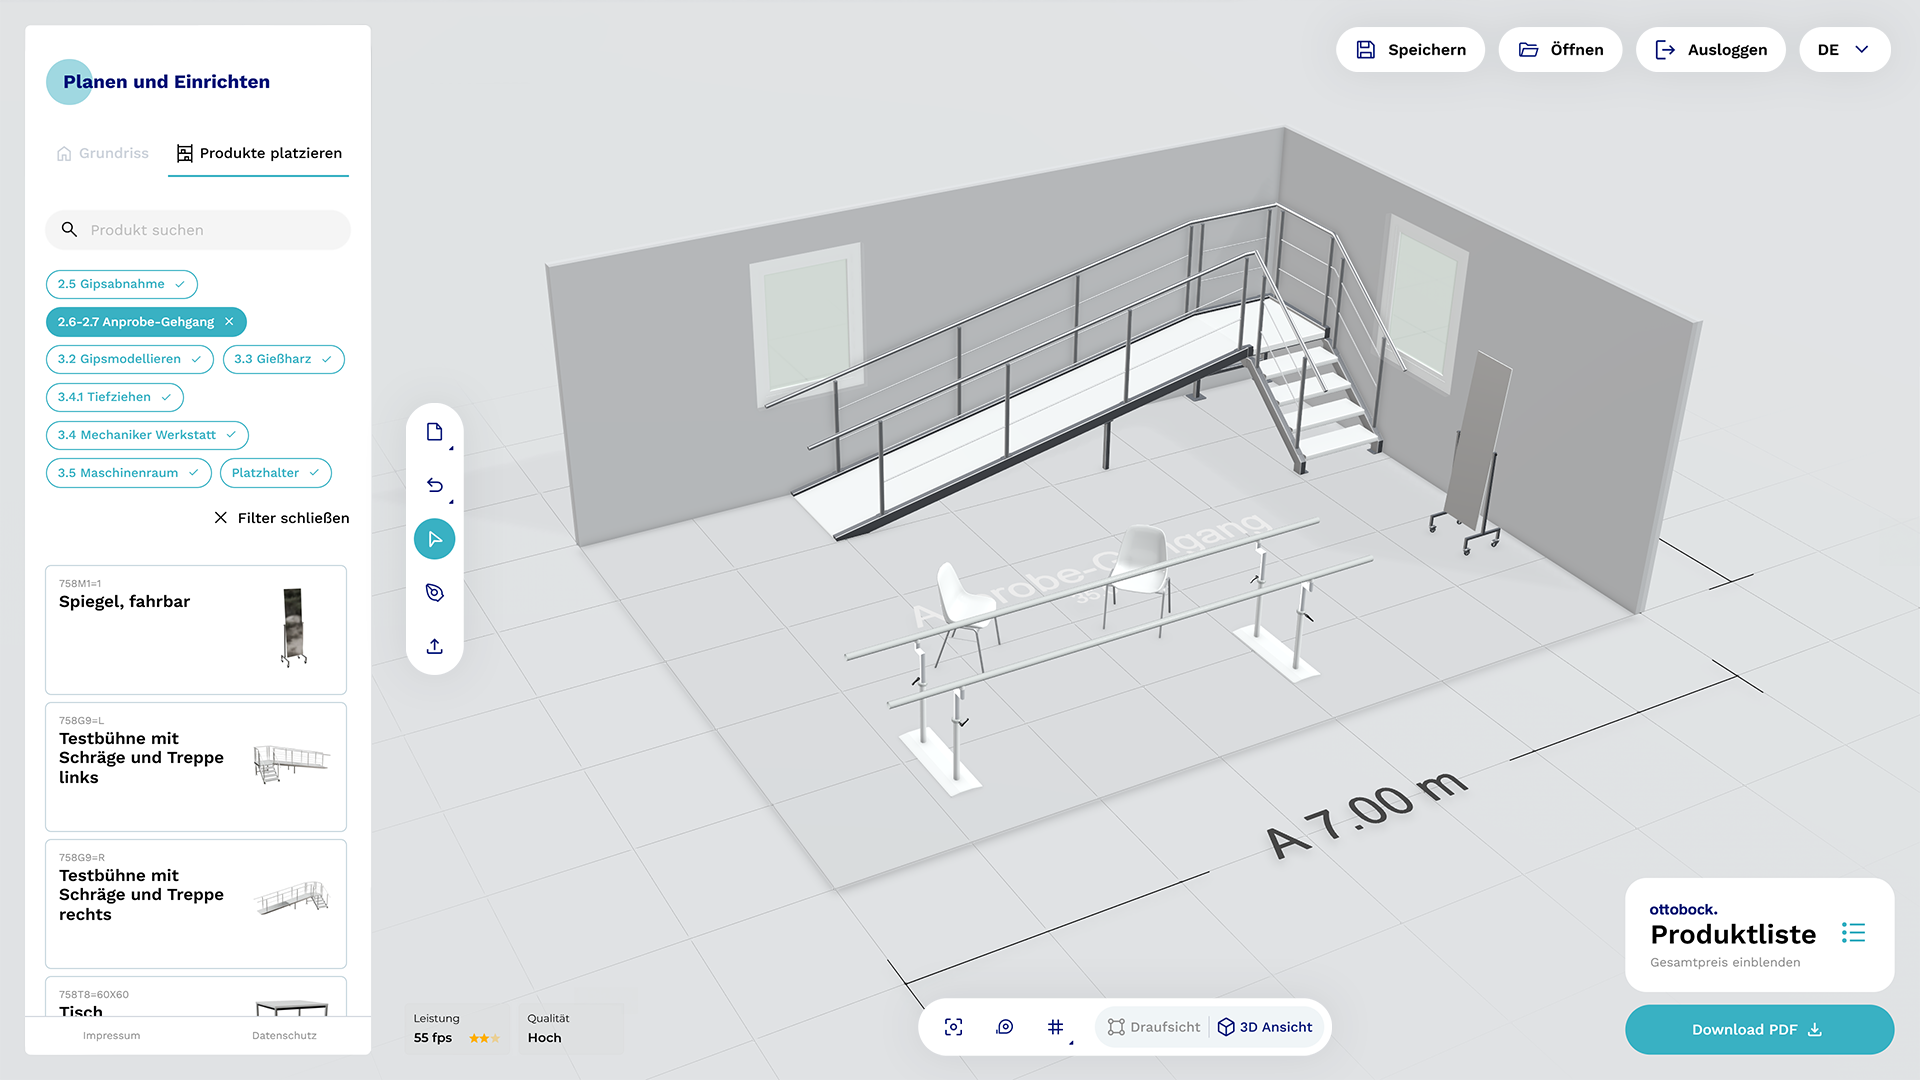
The planning of Ottobock workshops essentially consists of just two steps: defining the floor plan and furnishing it with products. To help you get started right away, you initially begin in a pre-defined room. If the preset room dimensions do not meet your requirements, you can adjust them at any time or create a completely new floor plan.
... and furnish via drag & drop
Once the defined floor plan meets your expectations, you can begin furnishing it immediately. Simply drag the desired products from the sidebar into the 3D scene using drag & drop interaction and position them within your defined room. Alternatively, you can add products using the “Place in room” button, and a suitable position will automatically be found for your product.
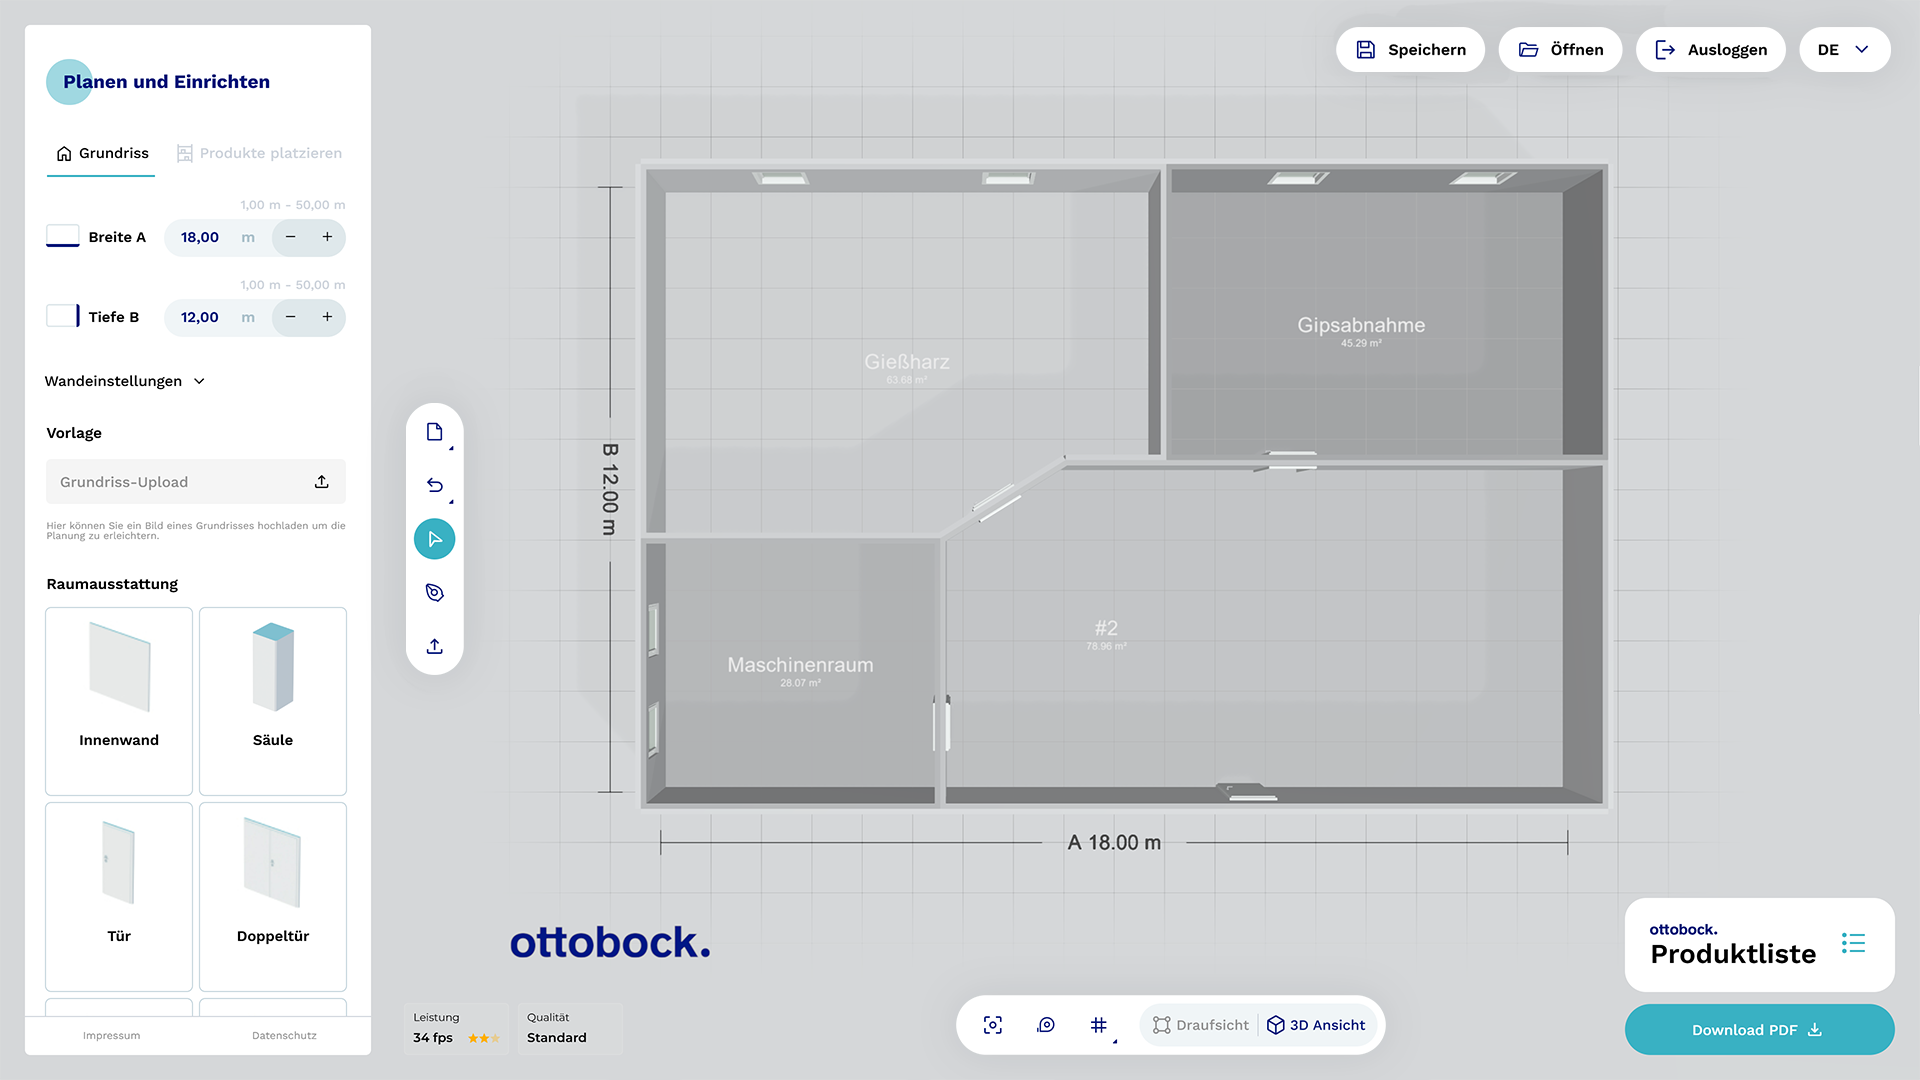
Comprehensive floor plan design
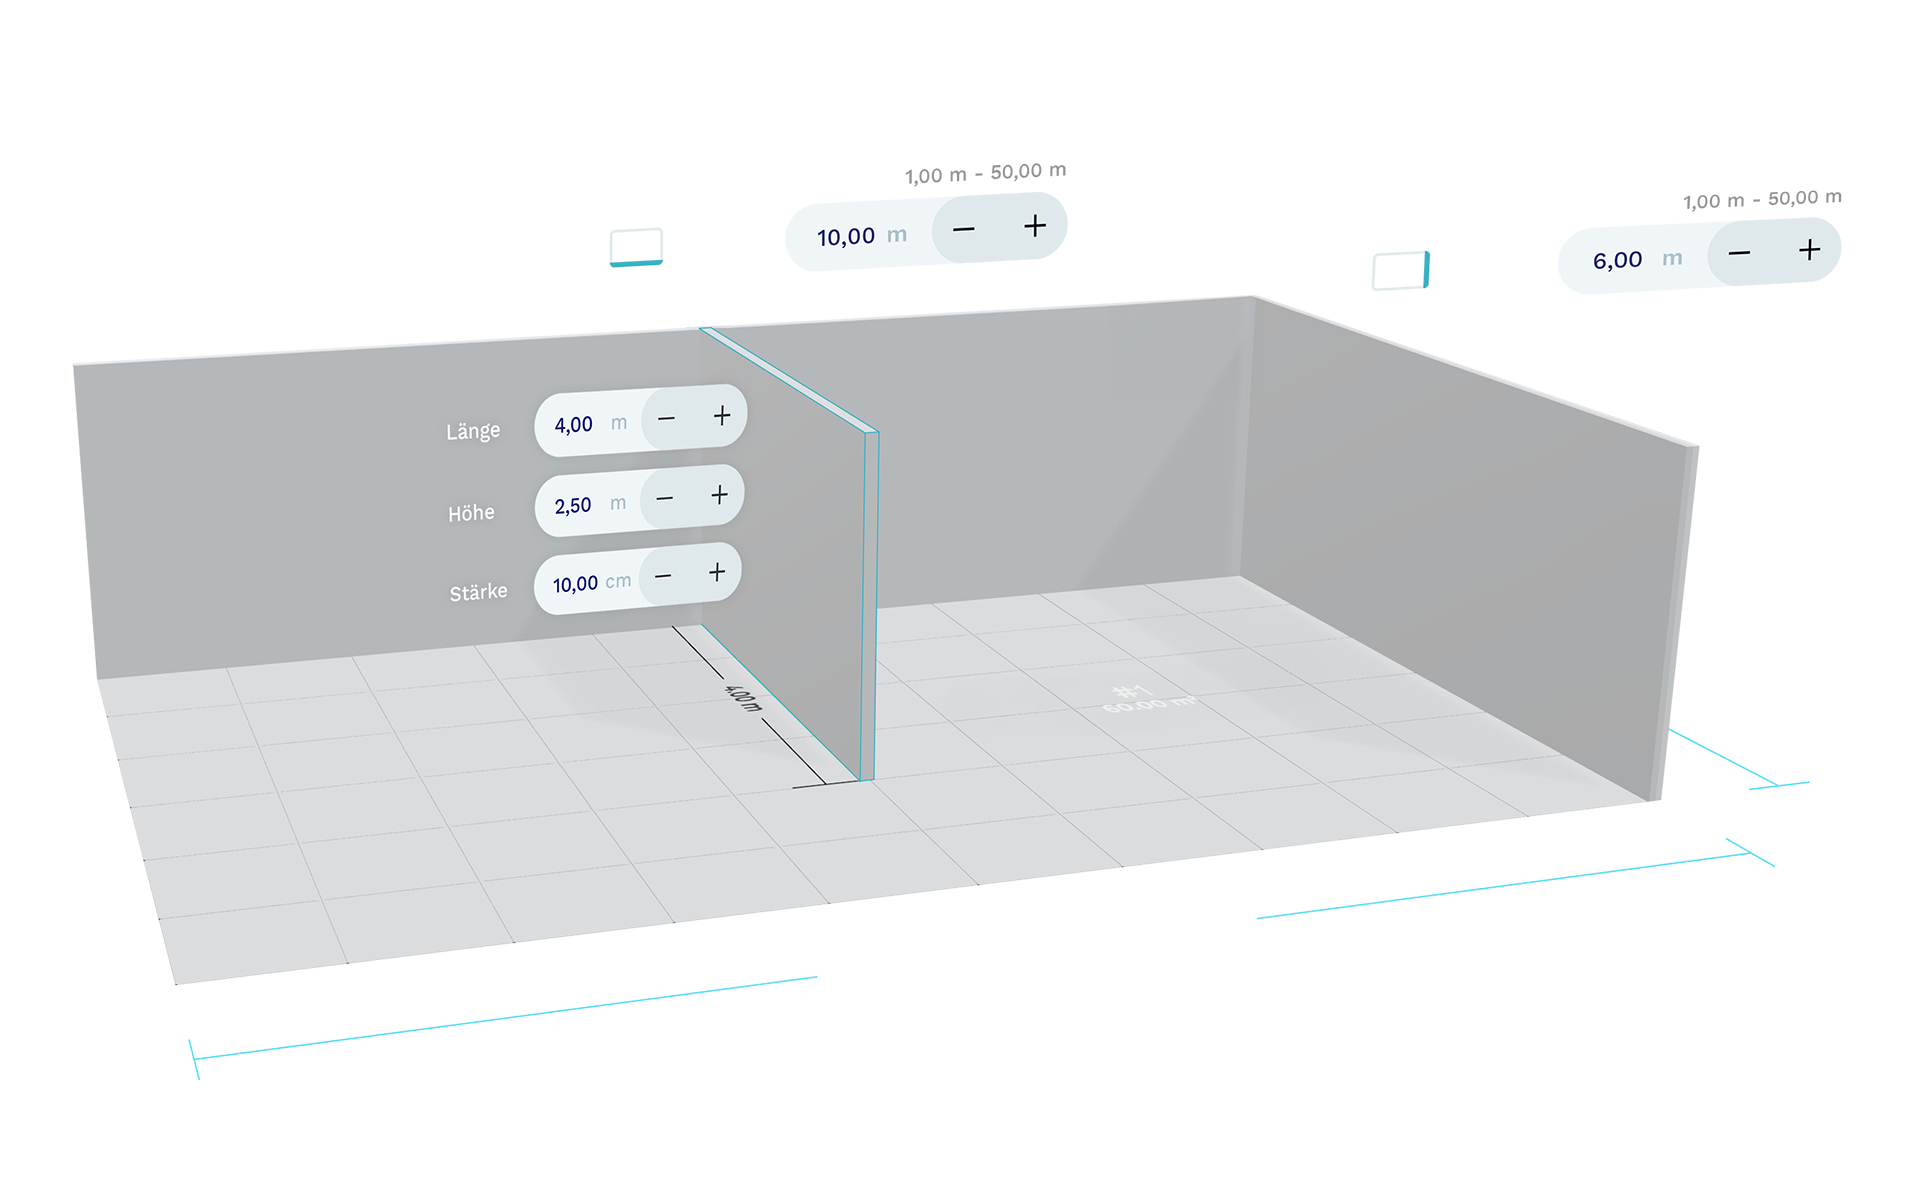
The default rectangular room already allows you to represent many basic layouts. However, since real spaces are often more complex, the 3D Planner offers even more flexibility: you can draw your floor plan completely from scratch. To support this, practical tools are available that allow you to precisely define your desired room or even entire floors.

Upload a template ...
If you already have a floor plan of the desired floor or room, you can simply upload it and use it as the basis for your own layout. To ensure everything remains to scale, the scale can be measured and adjusted precisely.

... pick up your pen
Whether or not you’re using a template – when freely drawing your floor plan, you can define the shape step by step by placing points. The 3D Planner automatically connects these points to form a surface, which can then be edited just like a pre-defined room.

Move points

Add points

Delete points

Show dimensions

Edit dimensions

Show angles

Align to grid

Snap to guides
Subdivide & connect
Once the floor area or outer walls of your plan are defined, you can focus on placing interior walls and designing wall features. Various structural elements are available for this purpose.
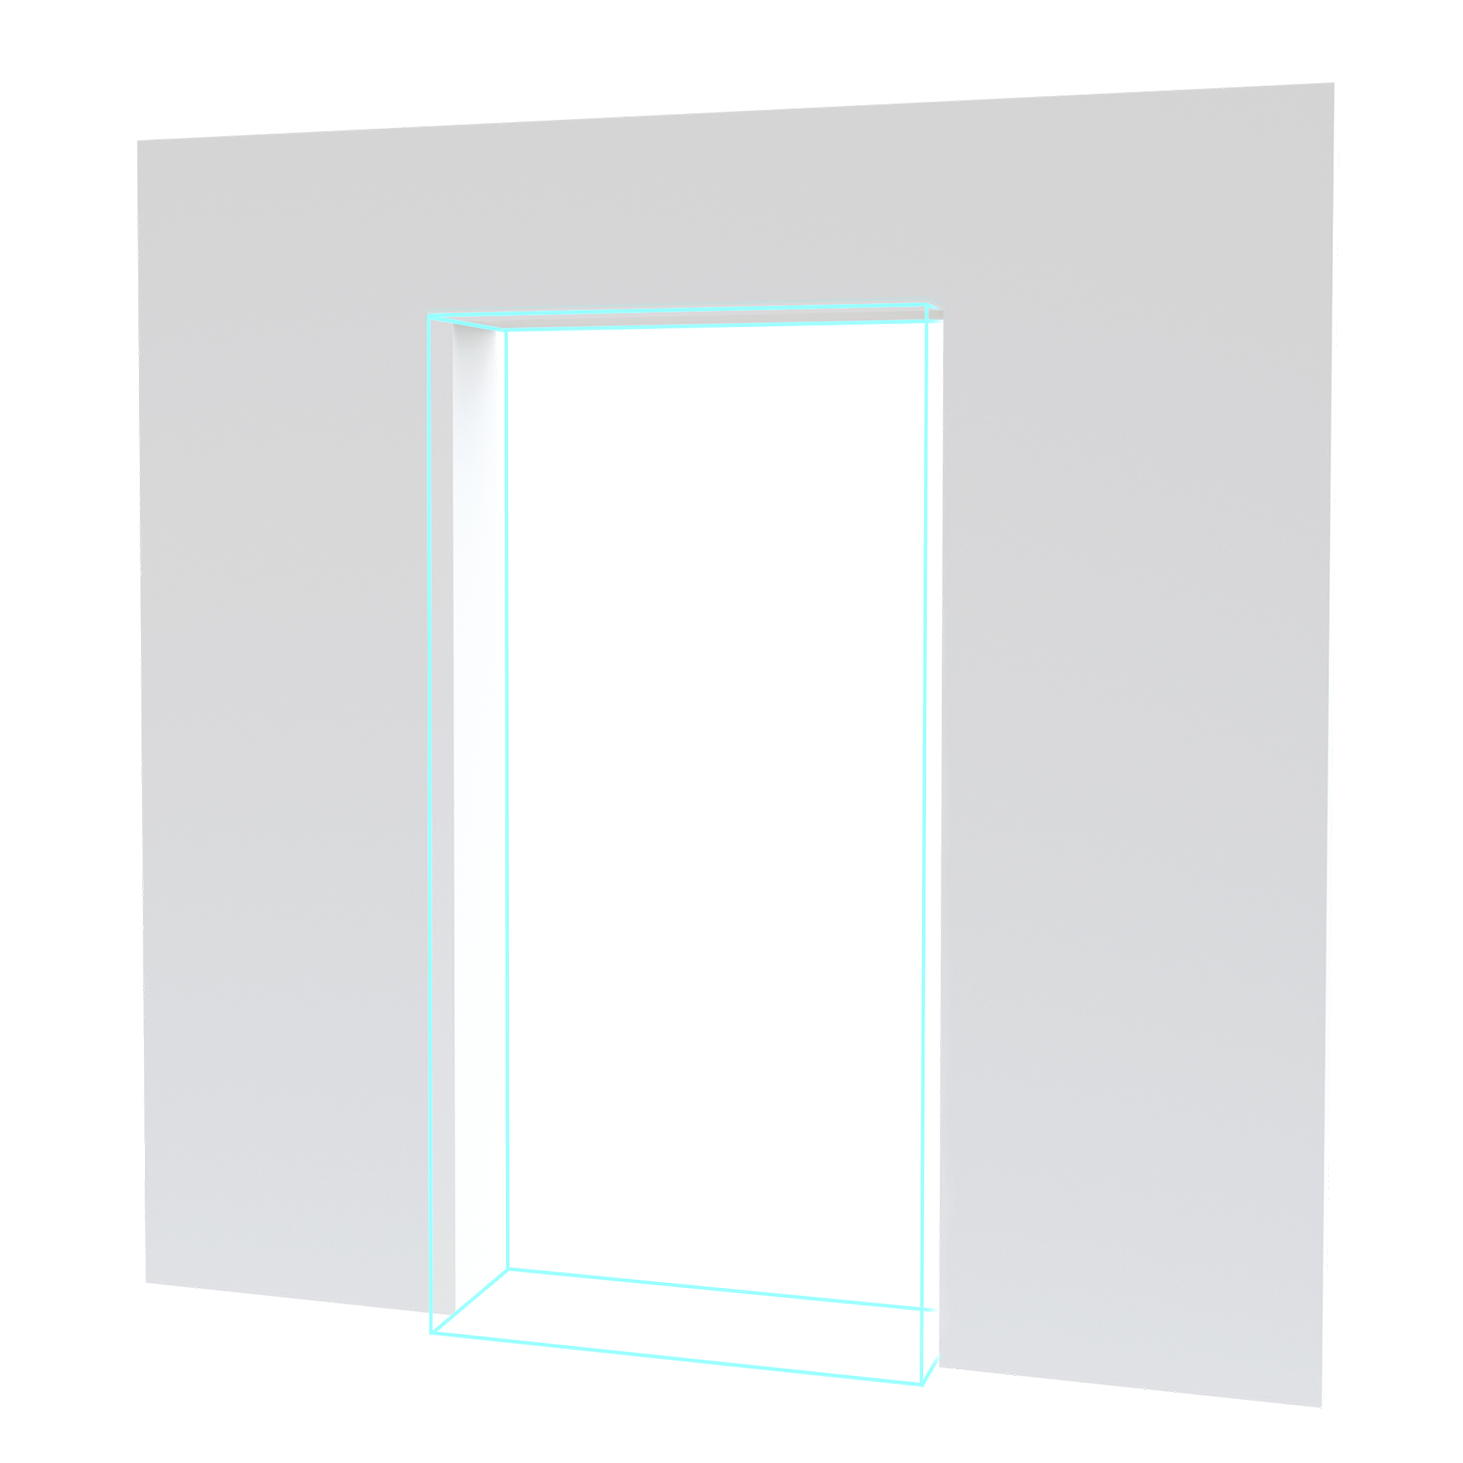
Openings
Openings can be integrated into walls to connect rooms.
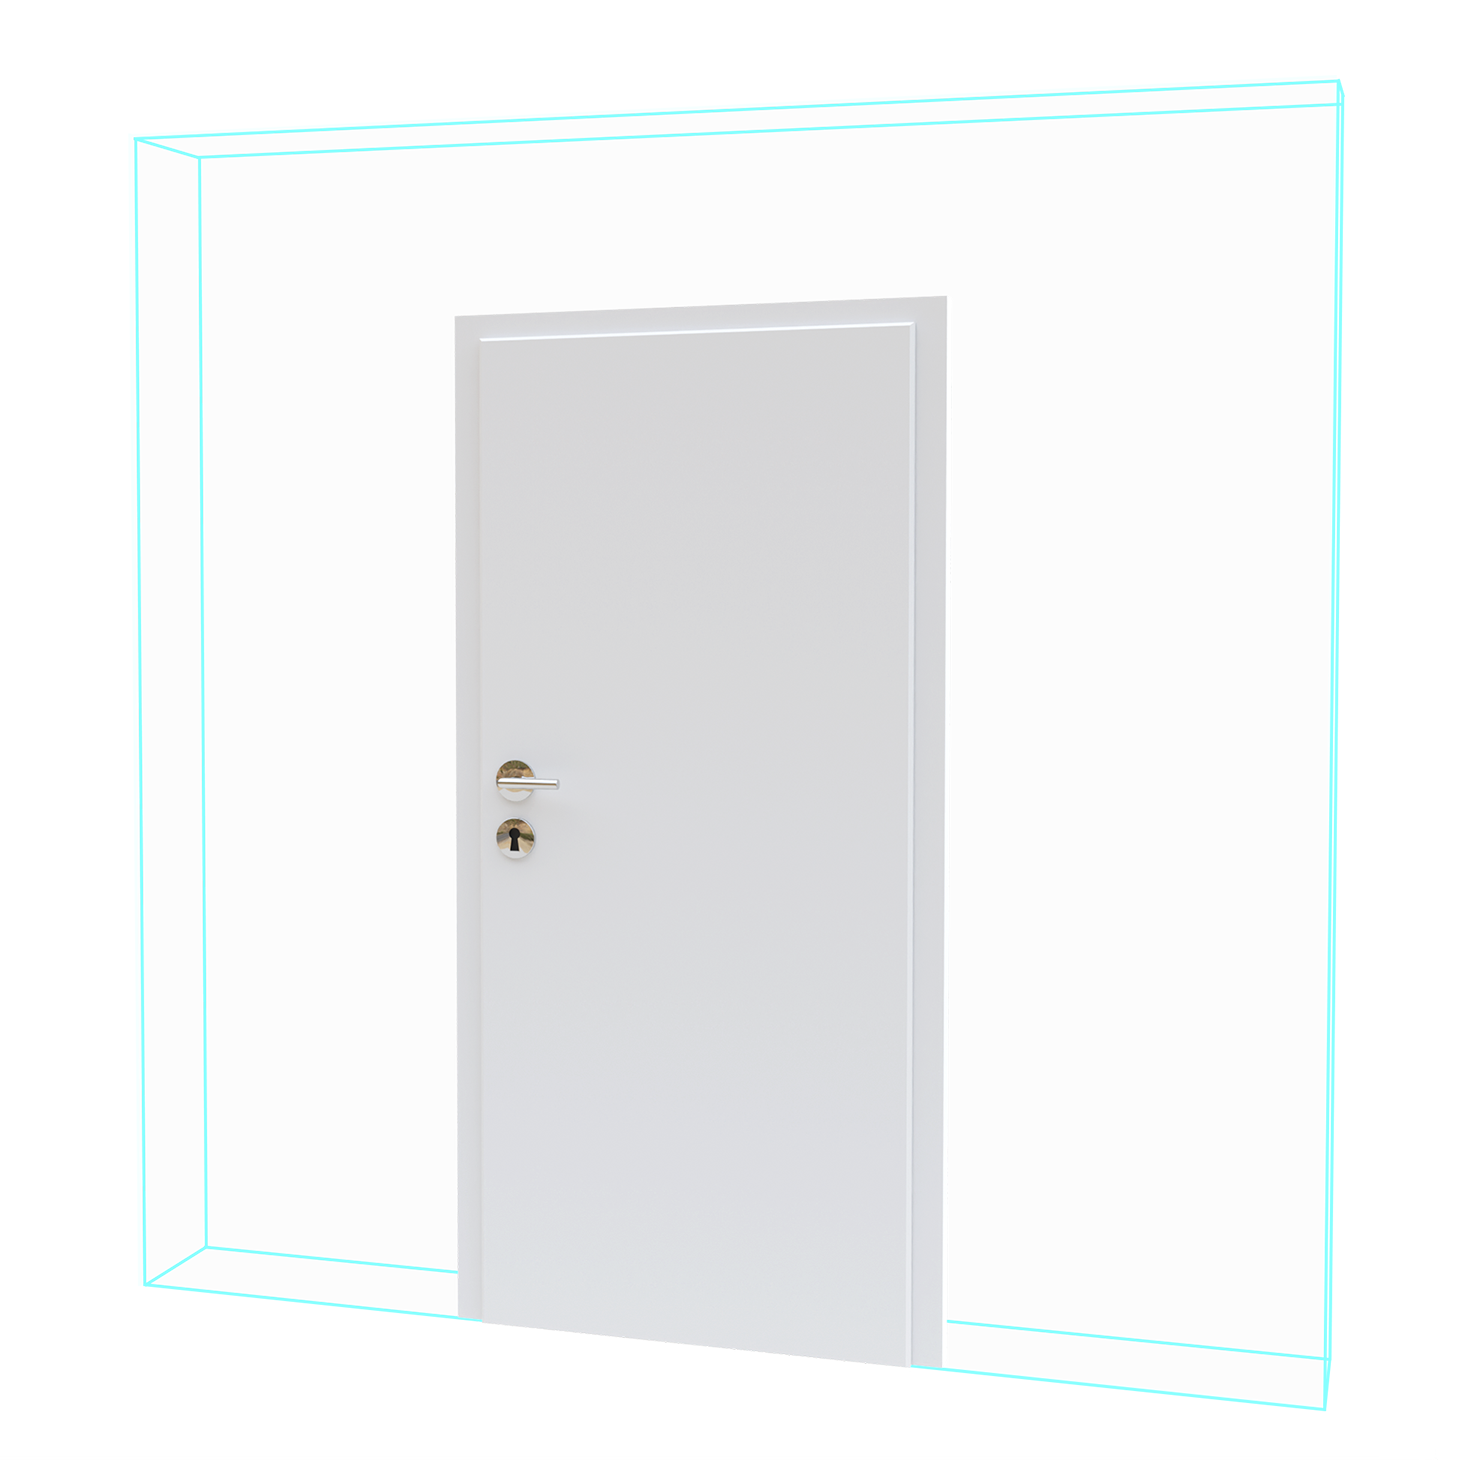
Doors
Doors, as an alternative to openings, can also be adjusted in height and width.
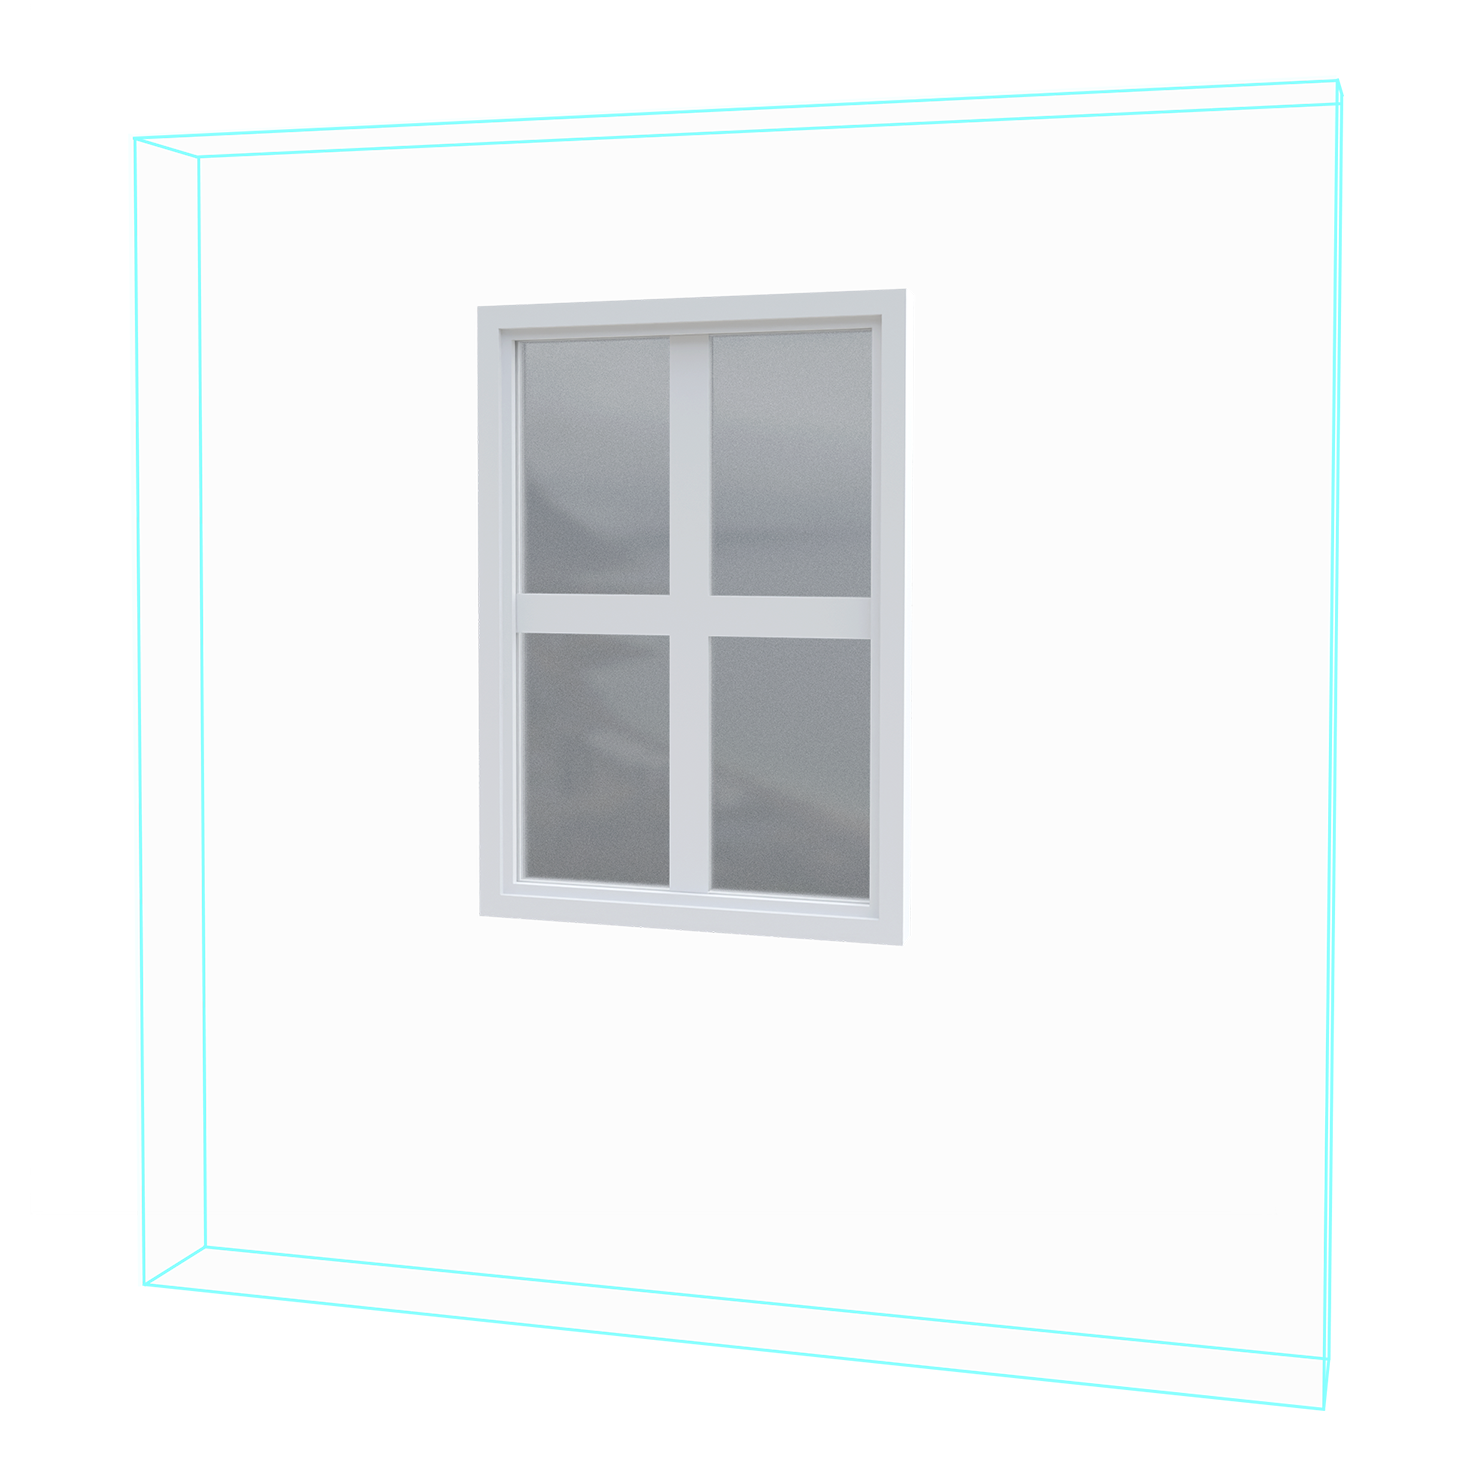
Windows
Placed windows can additionally be adjusted in height and sill height.
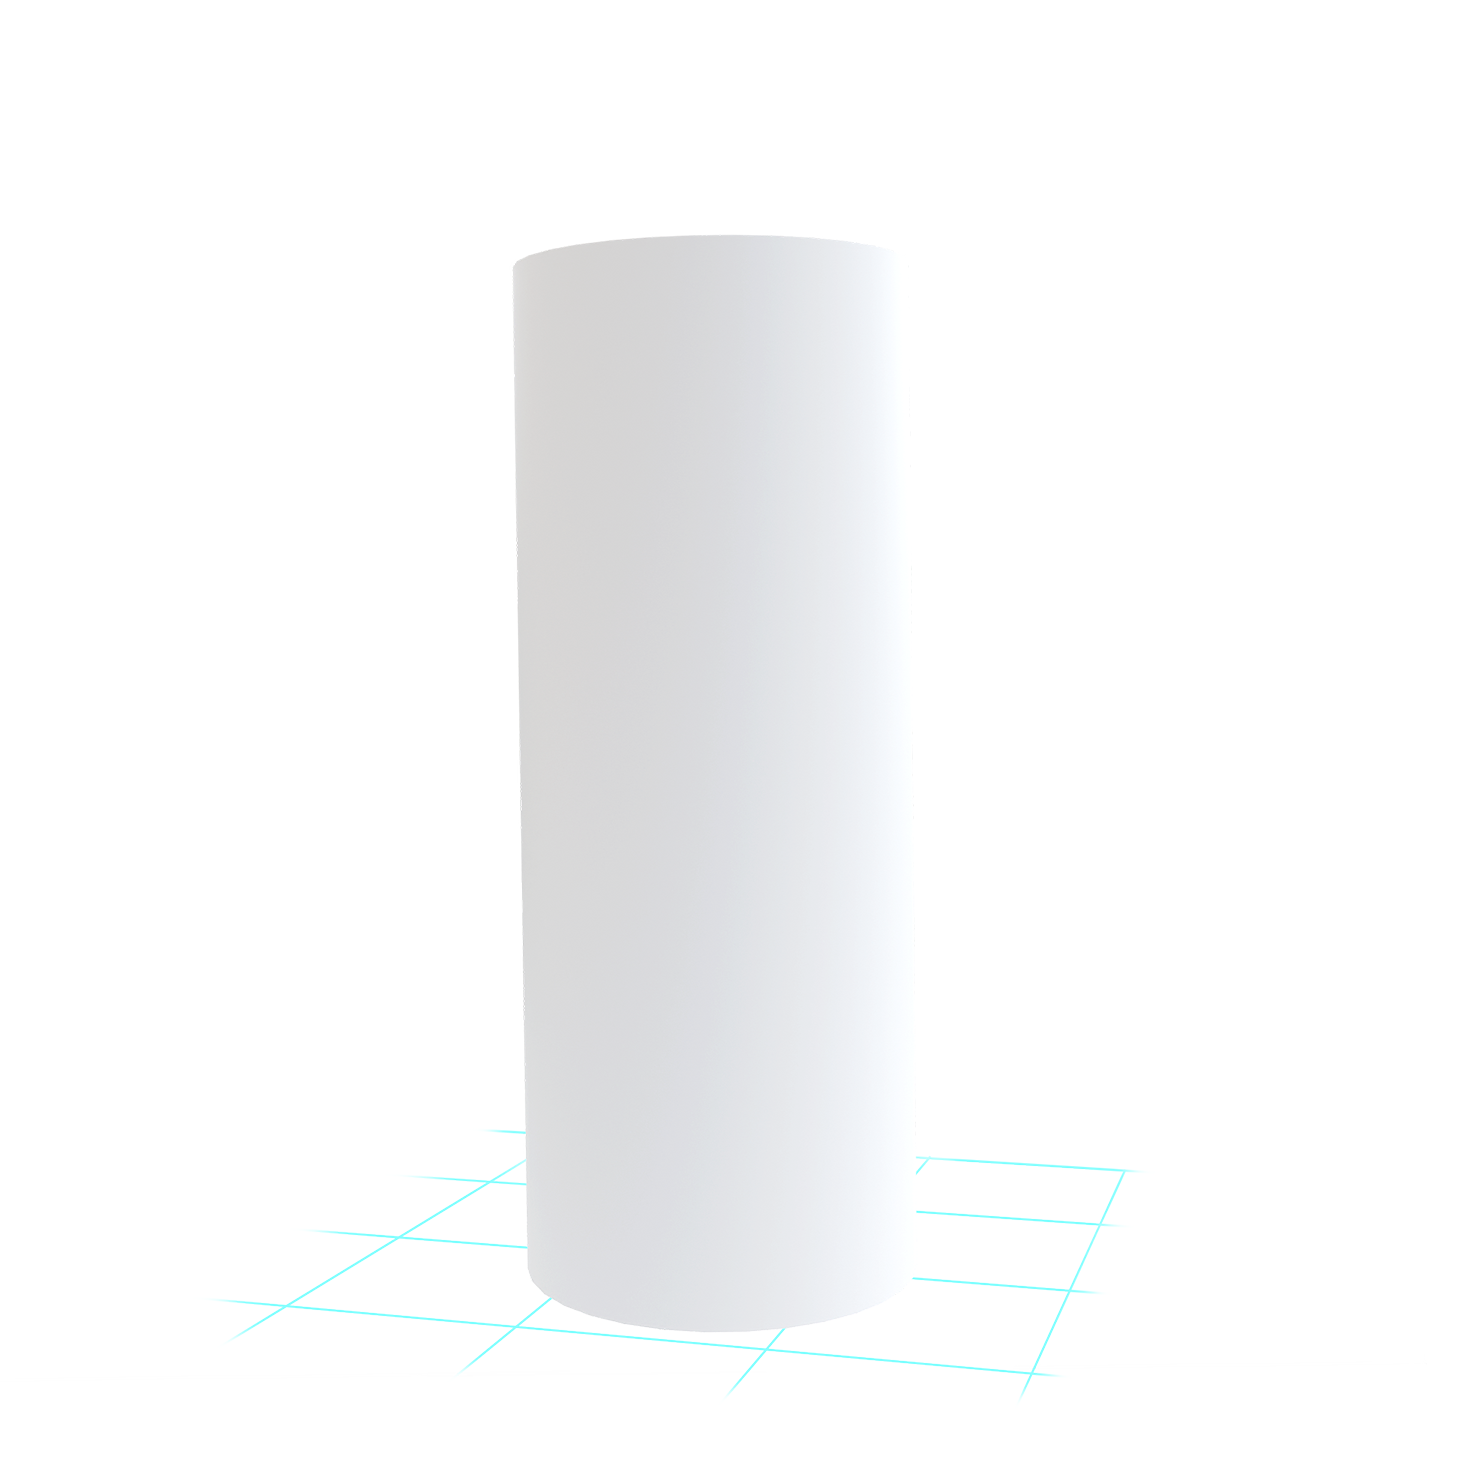
Columns
Columns are placed within the space and can be selected as either square or round.
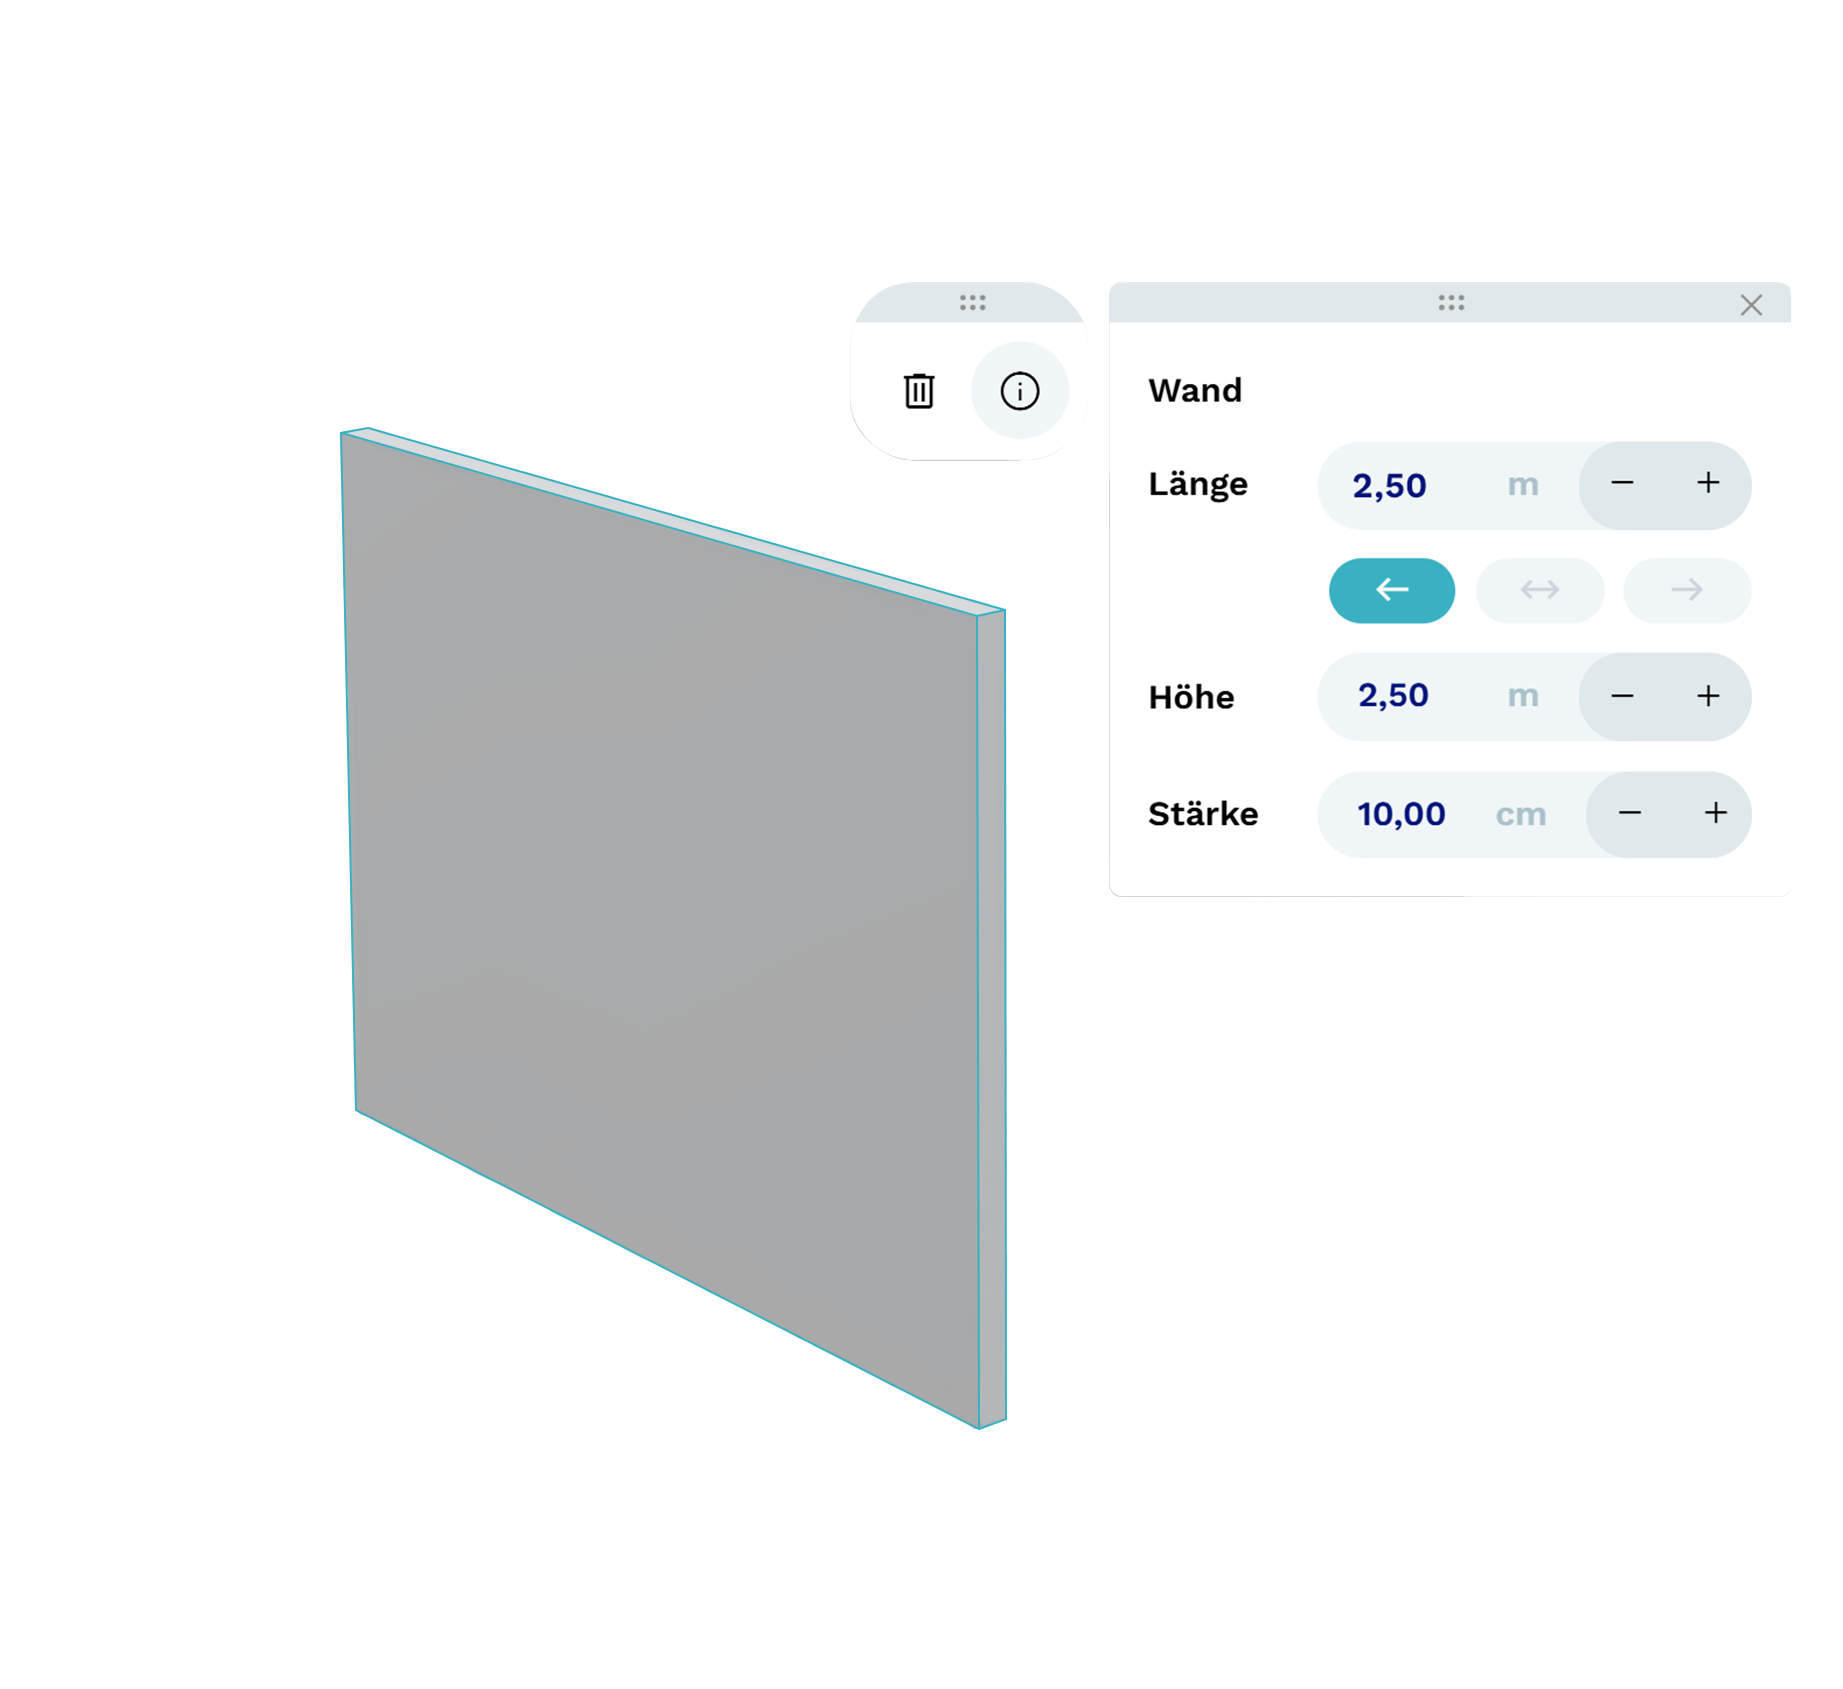
Detailed fine-tuning
All elements placed within your floor plan can be selected, moved, and adjusted at any time using the options in the context menu. This allows you to precisely edit dimensions afterward or simply delete an element if needed.
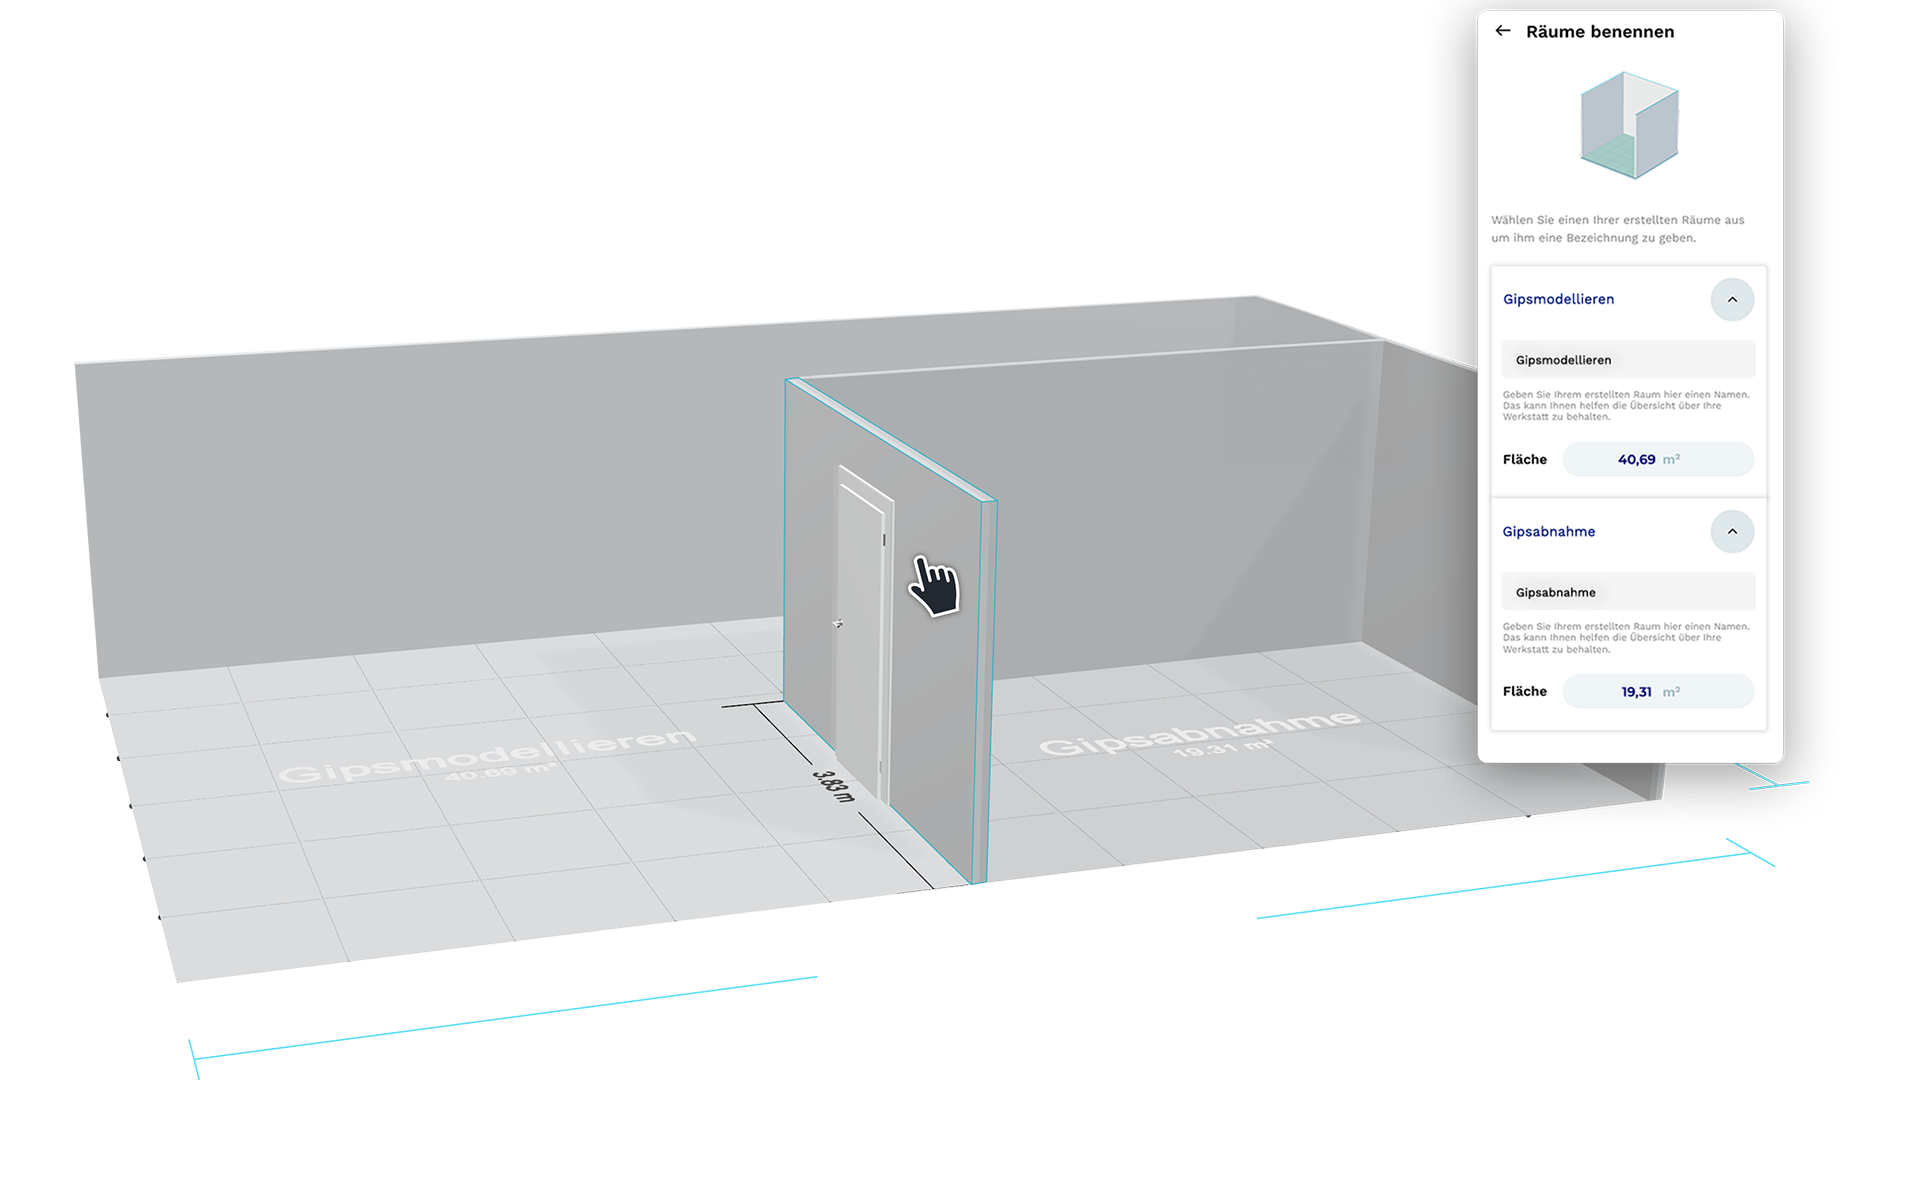
Automatic room recognition
As soon as a closed area is created through the placement of walls, the 3D Planner automatically recognizes it as a room. Each room is initially labeled with a sequential number and its exact square footage, and can later be individually named via the user interface. Room names are also used later to organize the bill of materials.
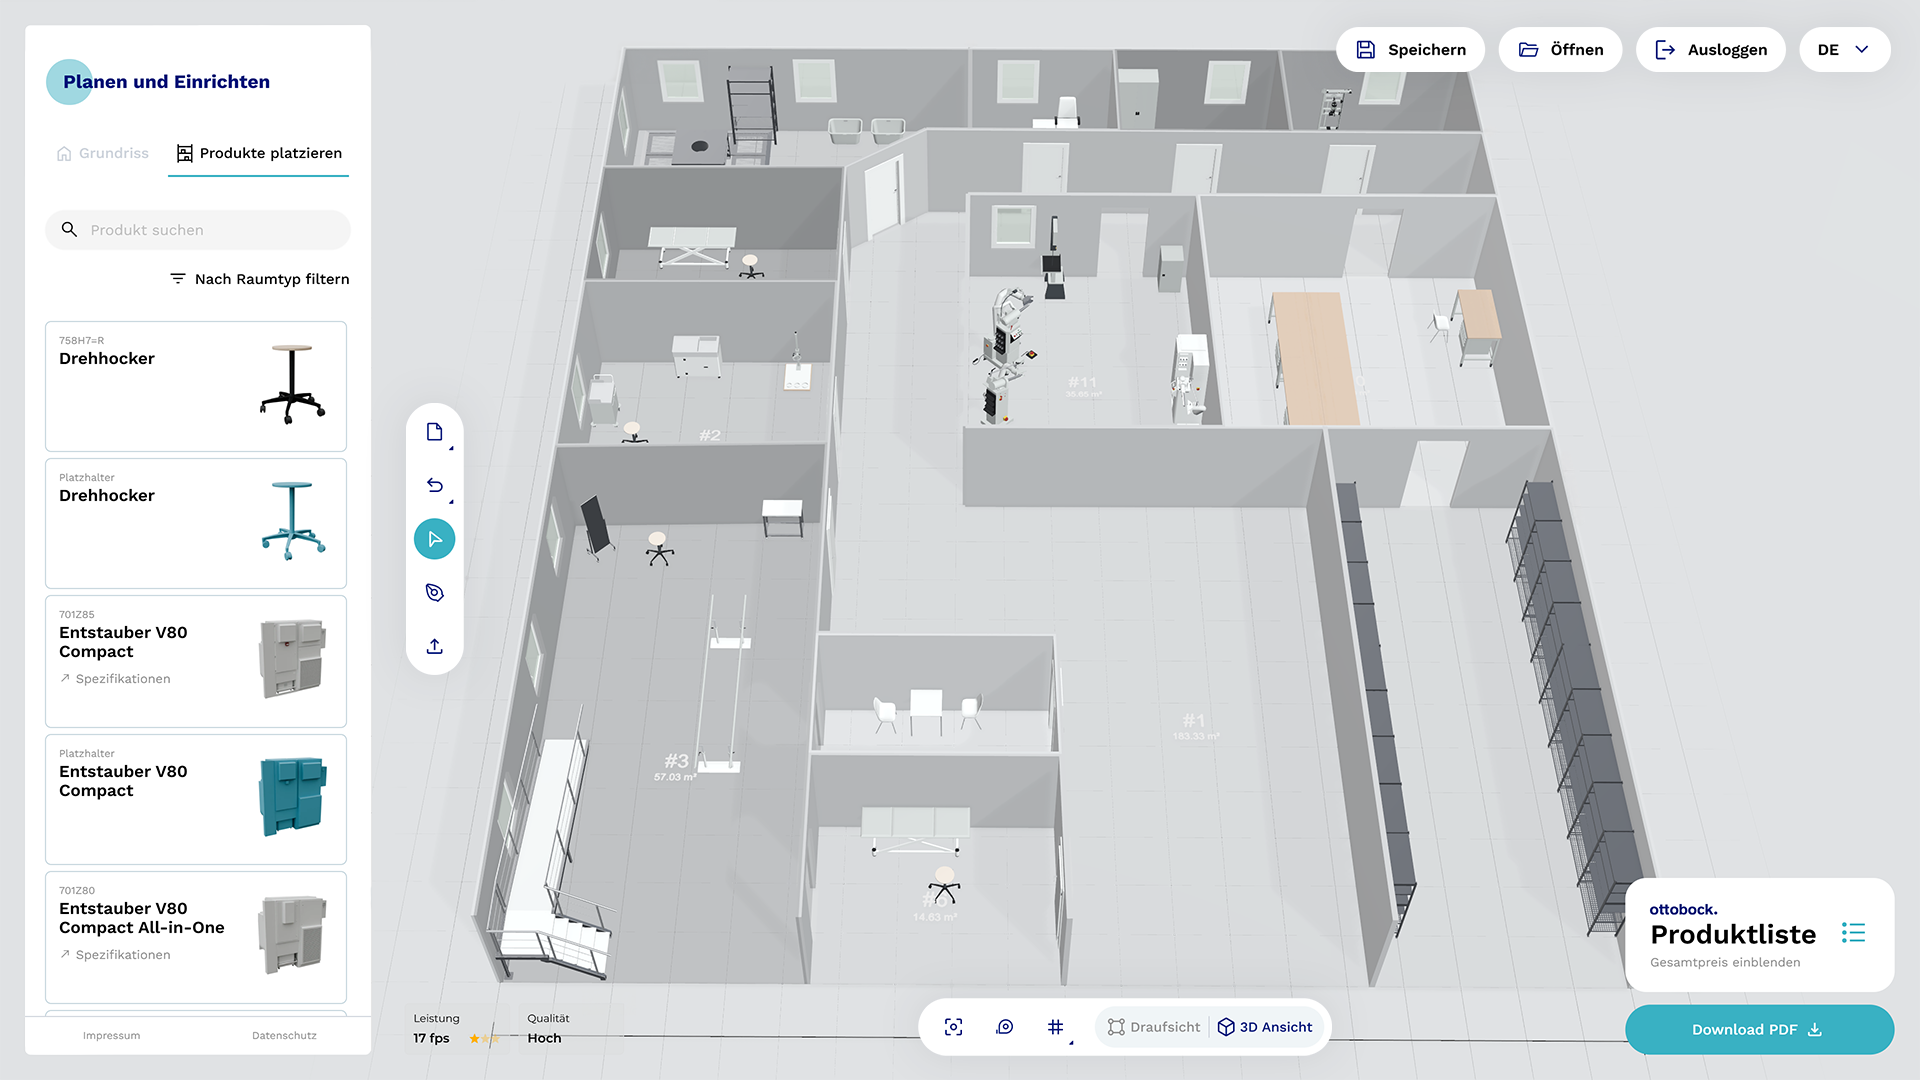
Add products
Once the floor plan is sufficiently defined, you can begin furnishing it with a variety of products. You can choose from machines, furnishings, and placeholder products. The placeholder products represent existing items that will be reused in the new workshop design and therefore do not need to be purchased again.
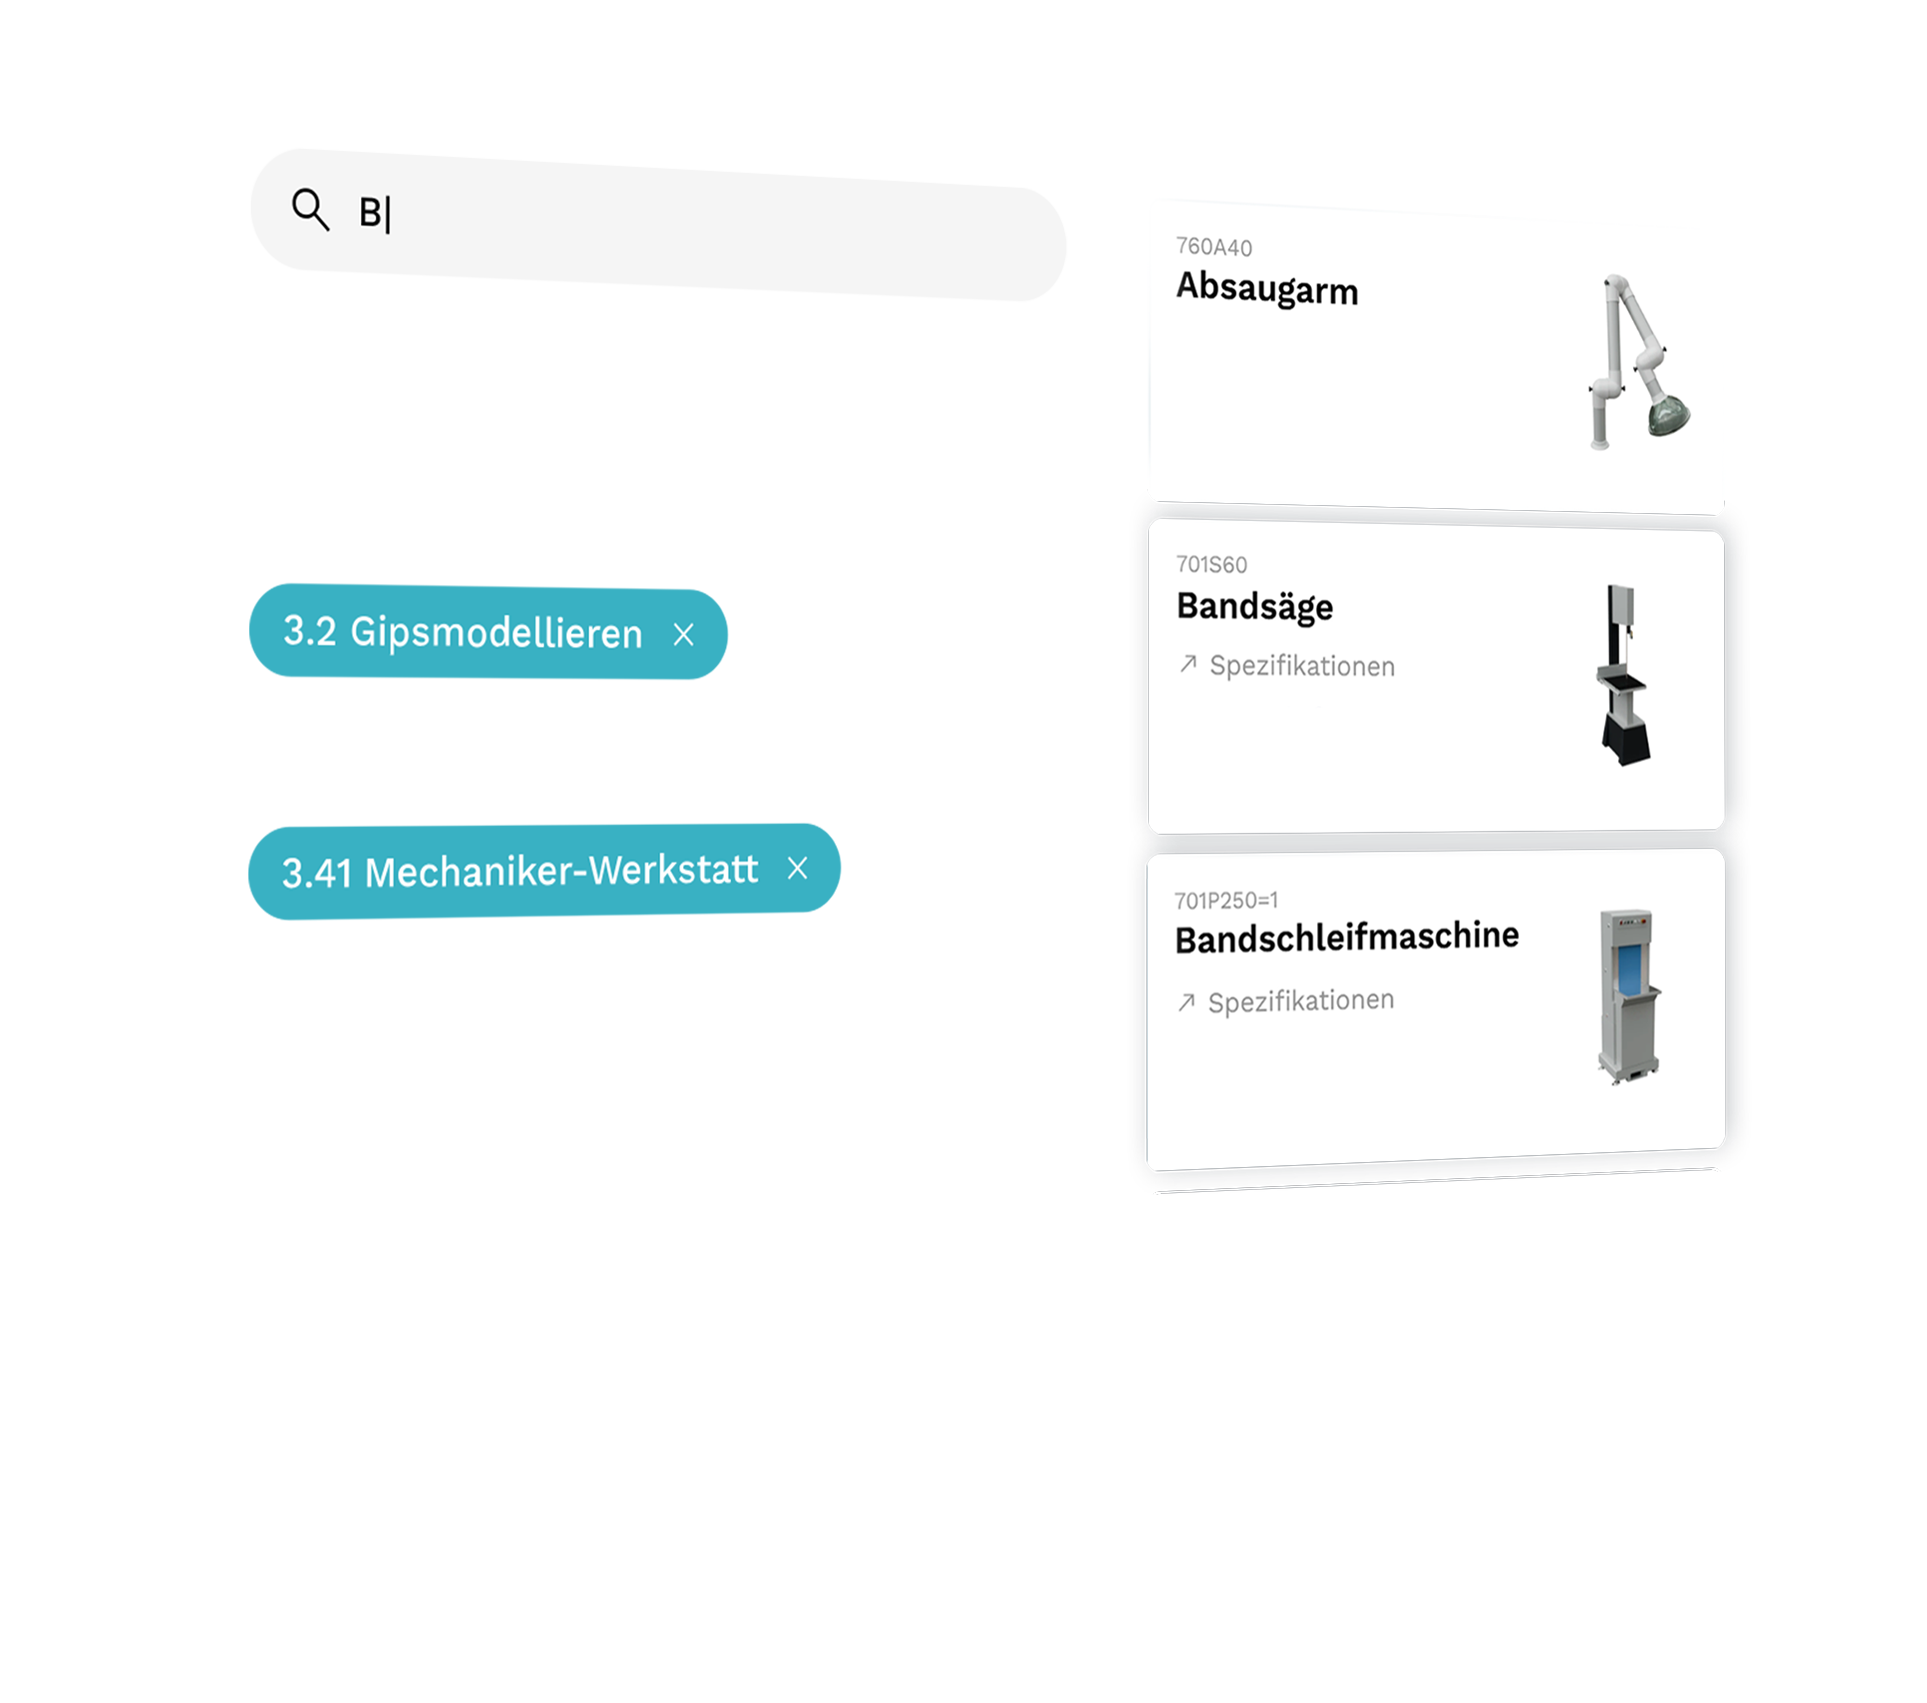
Quick to find
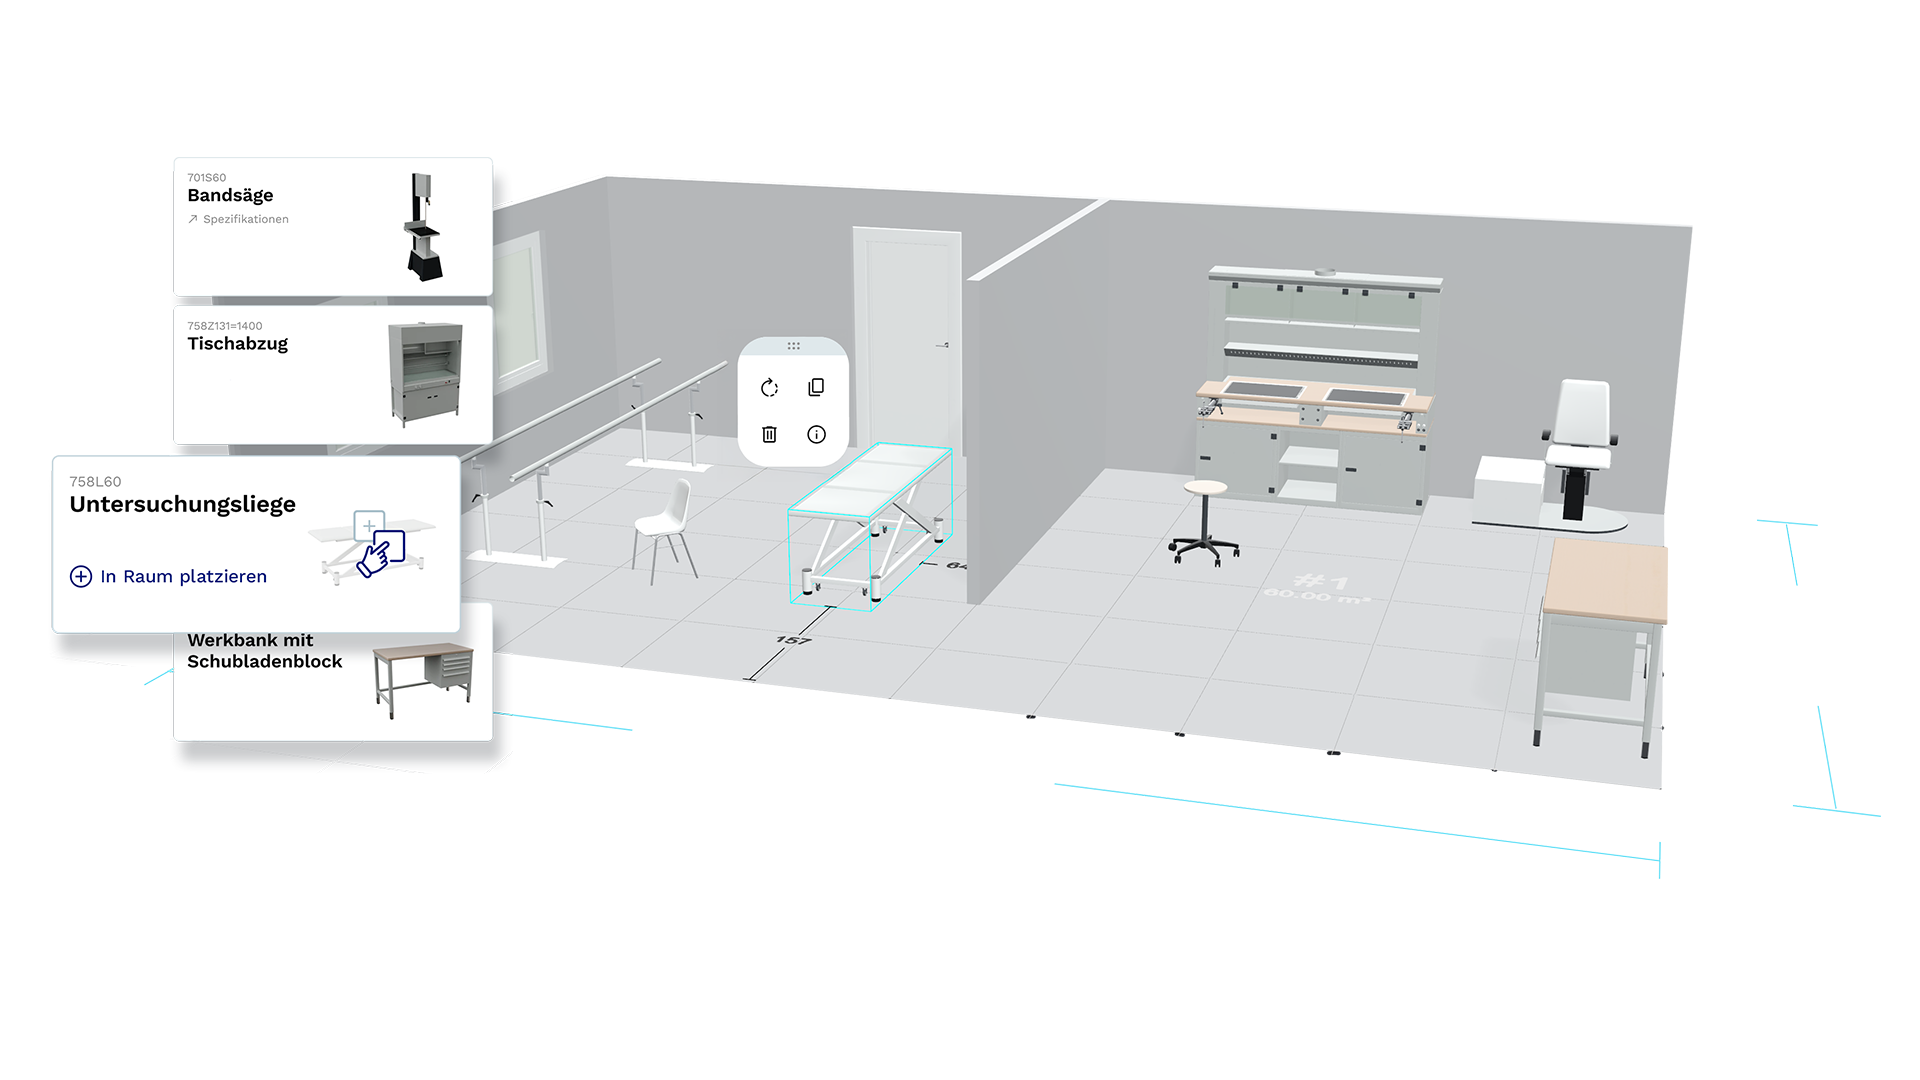
To help you quickly and easily locate the products you need, the 3D Planner offers both a search function and convenient filtering options. You can search for a specific product or display all products intended for a particular workshop area. Each product tile contains all relevant details: an image, the product name, and the item number.
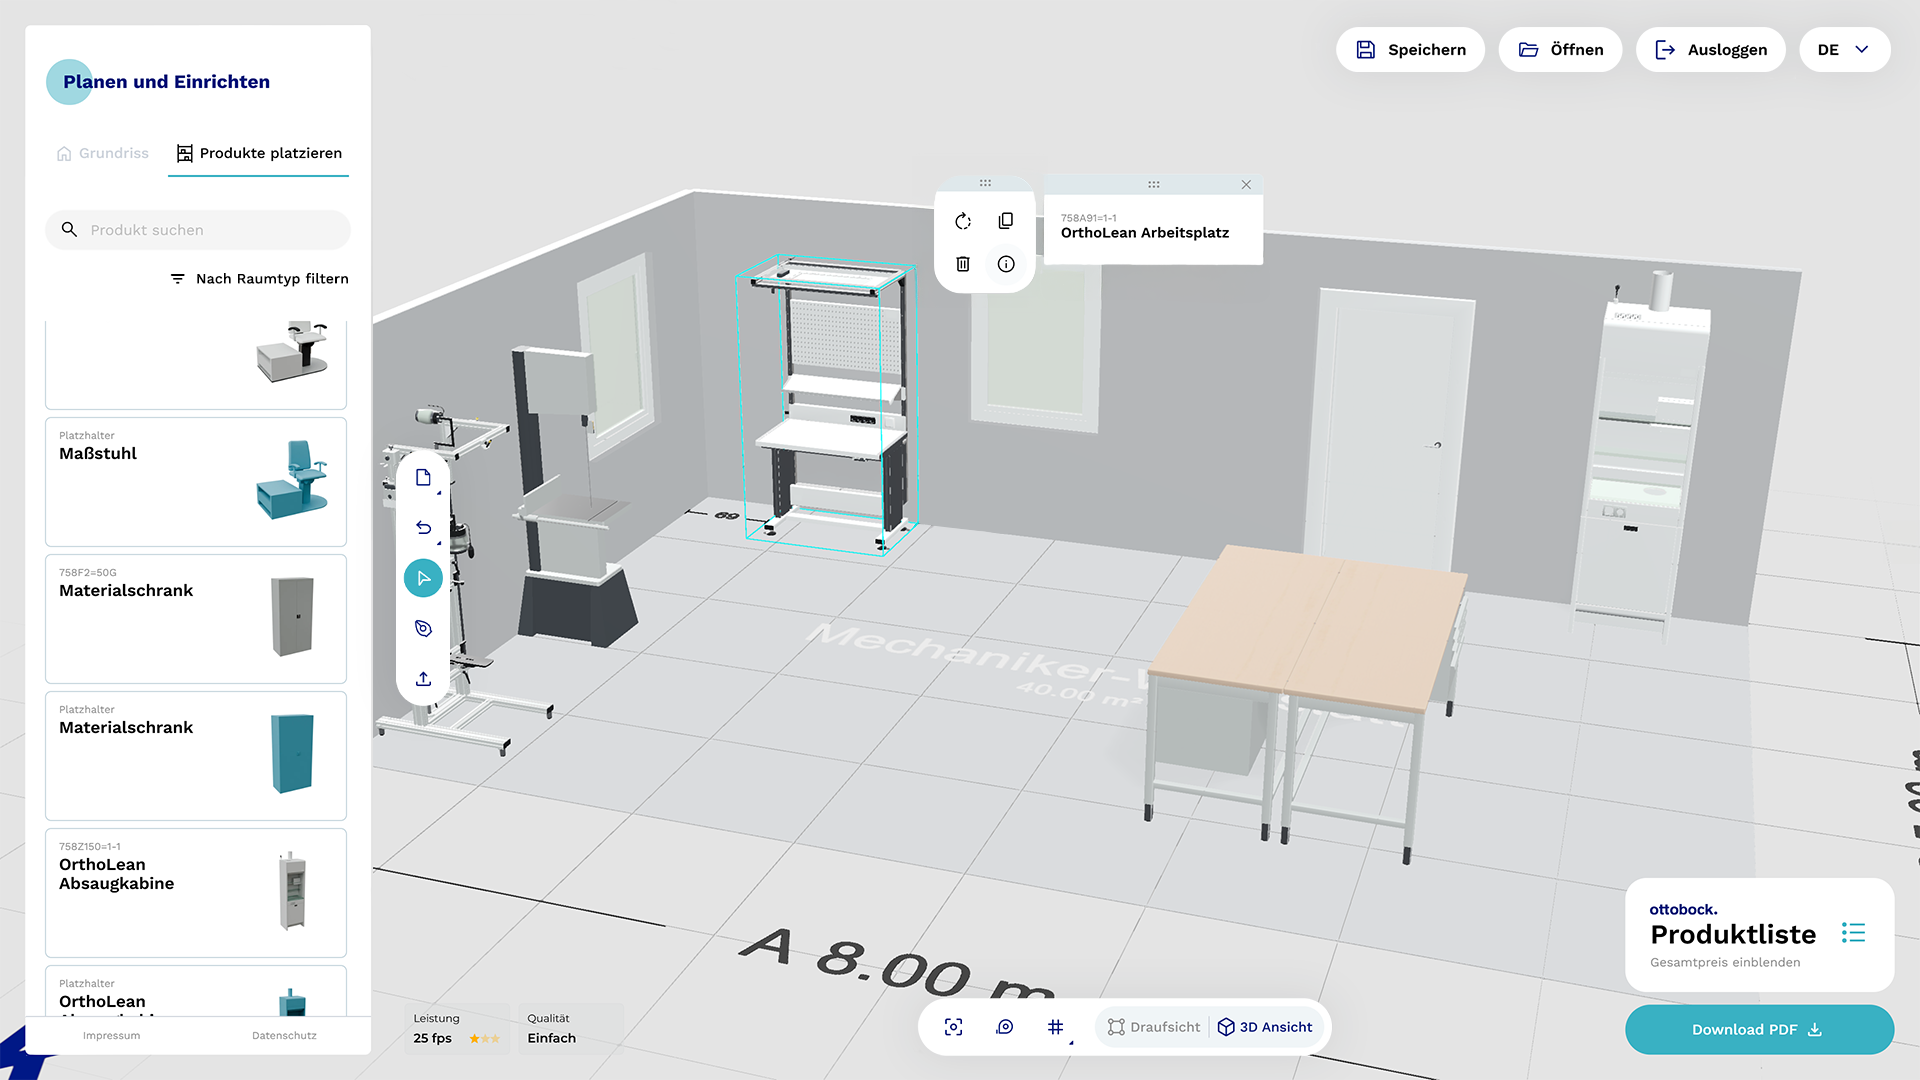
Quick to place
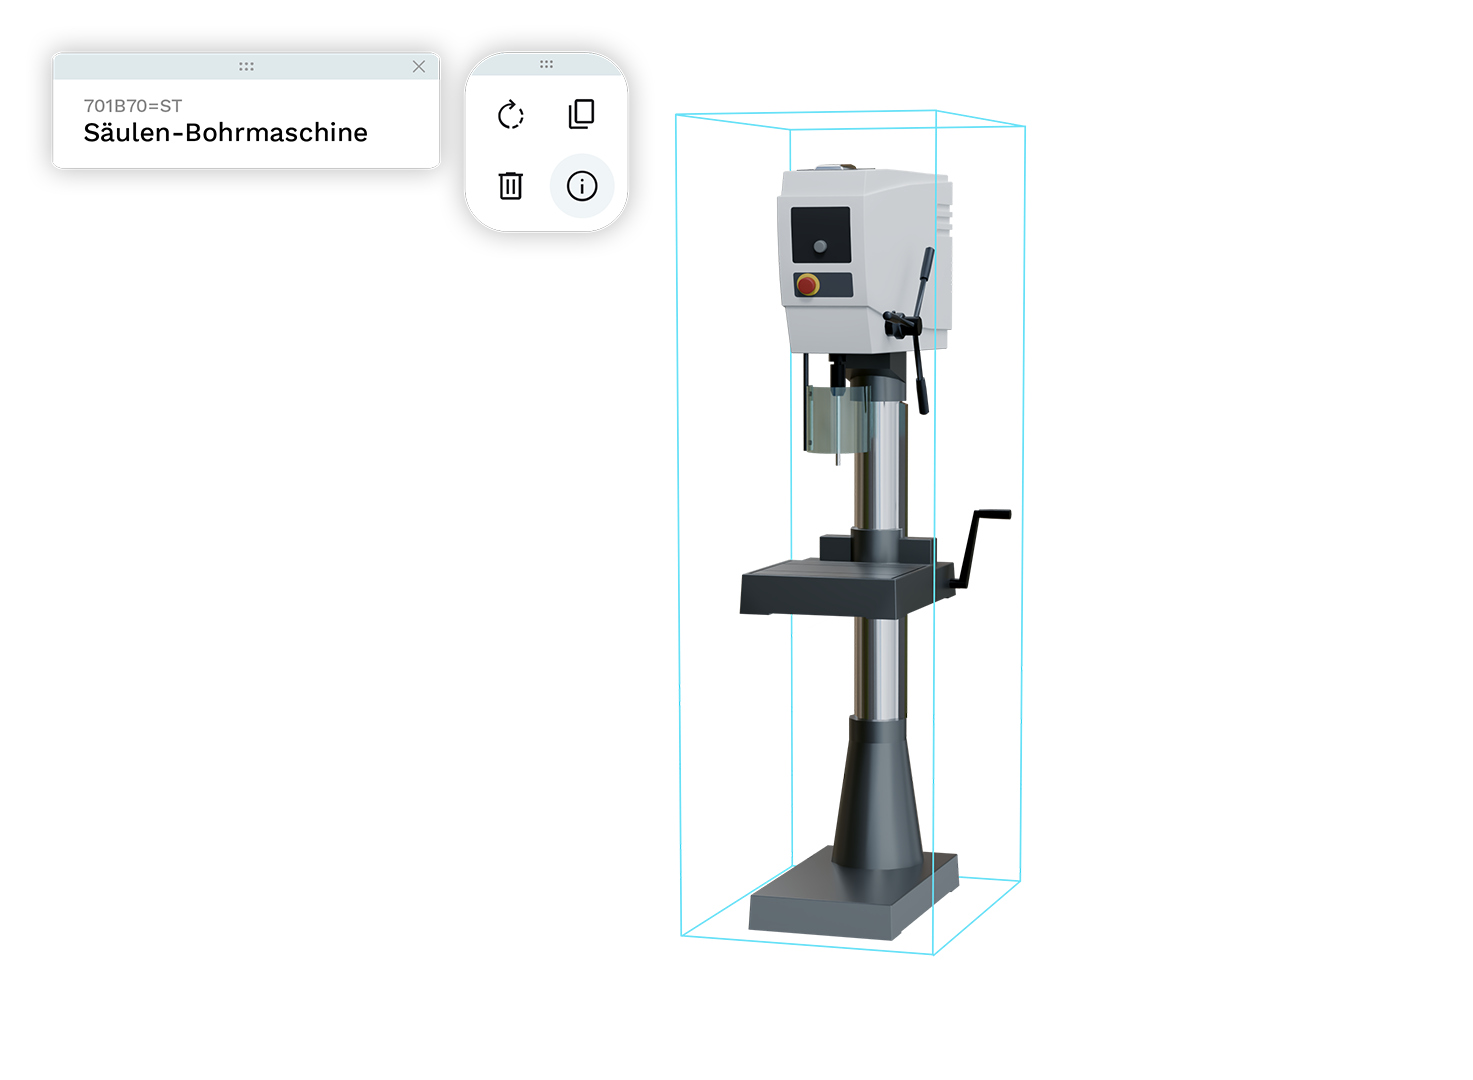
To furnish your room, simply drag products from the product list within the user interface into the 3D space using the drag & drop functionality. You can select and adjust all placed products at any time. If you lose track of the many items, you can display all relevant product details directly on the placed object.

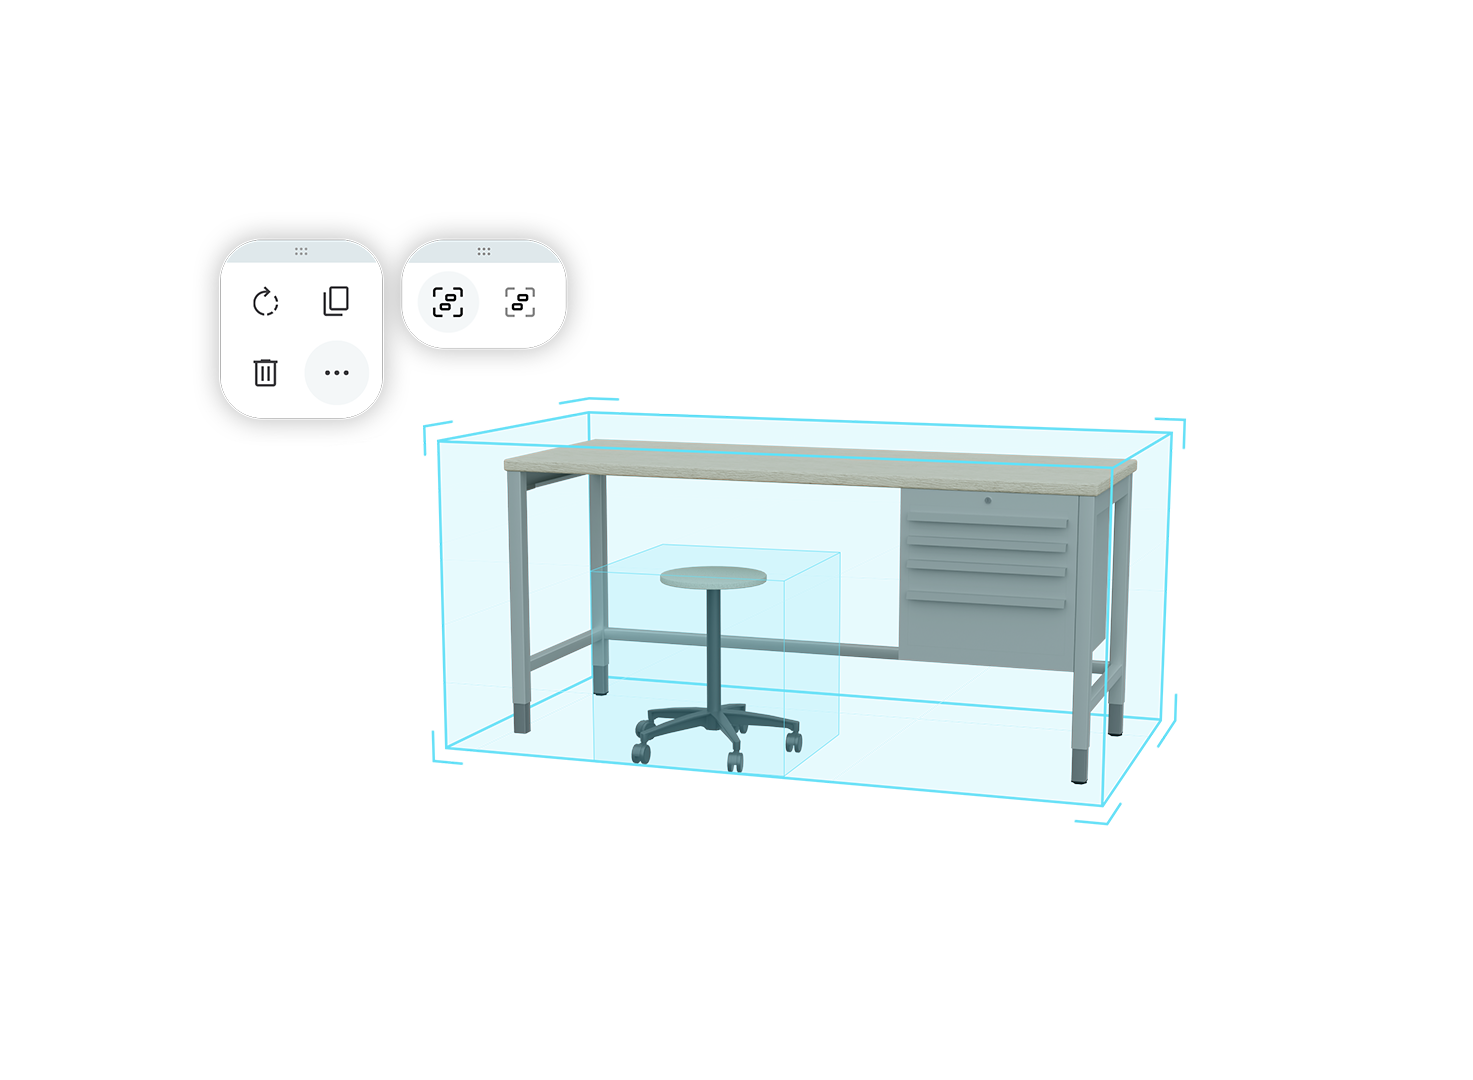
Move
Selected products can be moved using the left mouse button or the arrow keys.

Rotate
Products can be rotated via the context menu or by pressing Ctrl + arrow keys.

Duplicate
To create a duplicate, use the context menu or Ctrl + D.

Group
To combine products, group them via the context menu or Ctrl + G.

Dissolve Groups
Groups can be dissolved again via the context menu or Ctrl + Shift + G.

Show information
All product information can be accessed directly via the context menu on the item.

Delete
To remove products from the plan, use the context menu or the Delete key.
Perfectly aligned
To help you better judge distances and position products precisely, a grid is displayed on the floor. When you activate “Align to grid,” products snap exactly to the grid lines while being moved. If you prefer more flexibility, you can disable this setting at any time to freely position your items.
By the numbers
For even greater precision, the 3D Planner displays the exact distances between products and the lengths of wall elements. While the overall dimensions of your workshop remain visible at all times, distances and lengths appear only while editing specific elements. If you need a complete overview, you can also make all measurements of the room permanently visible.
Well combined
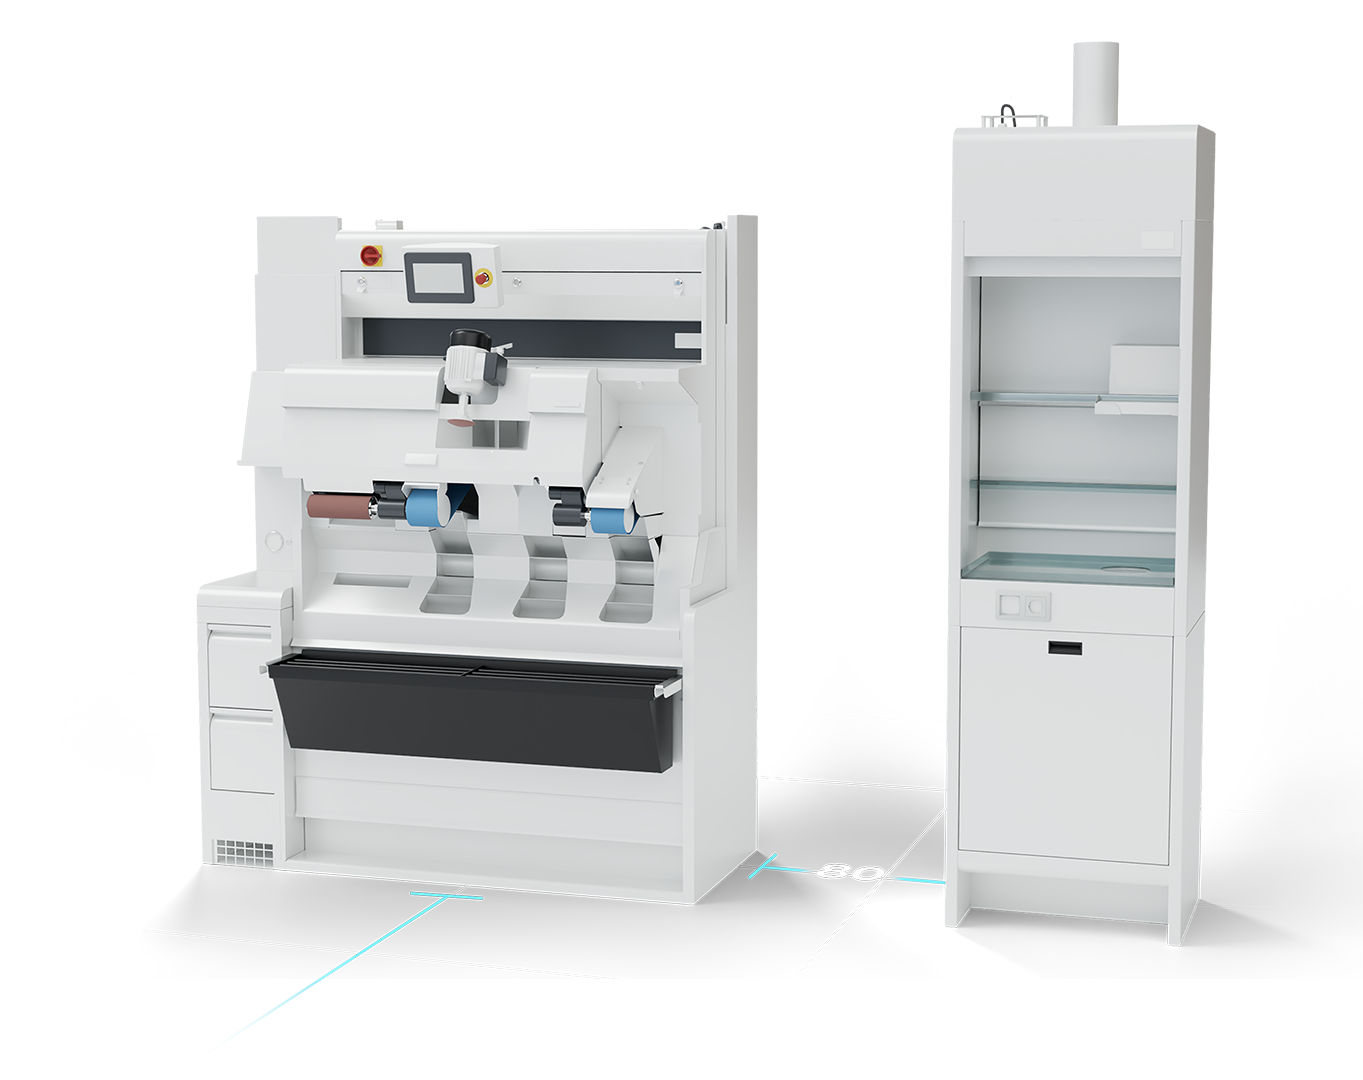
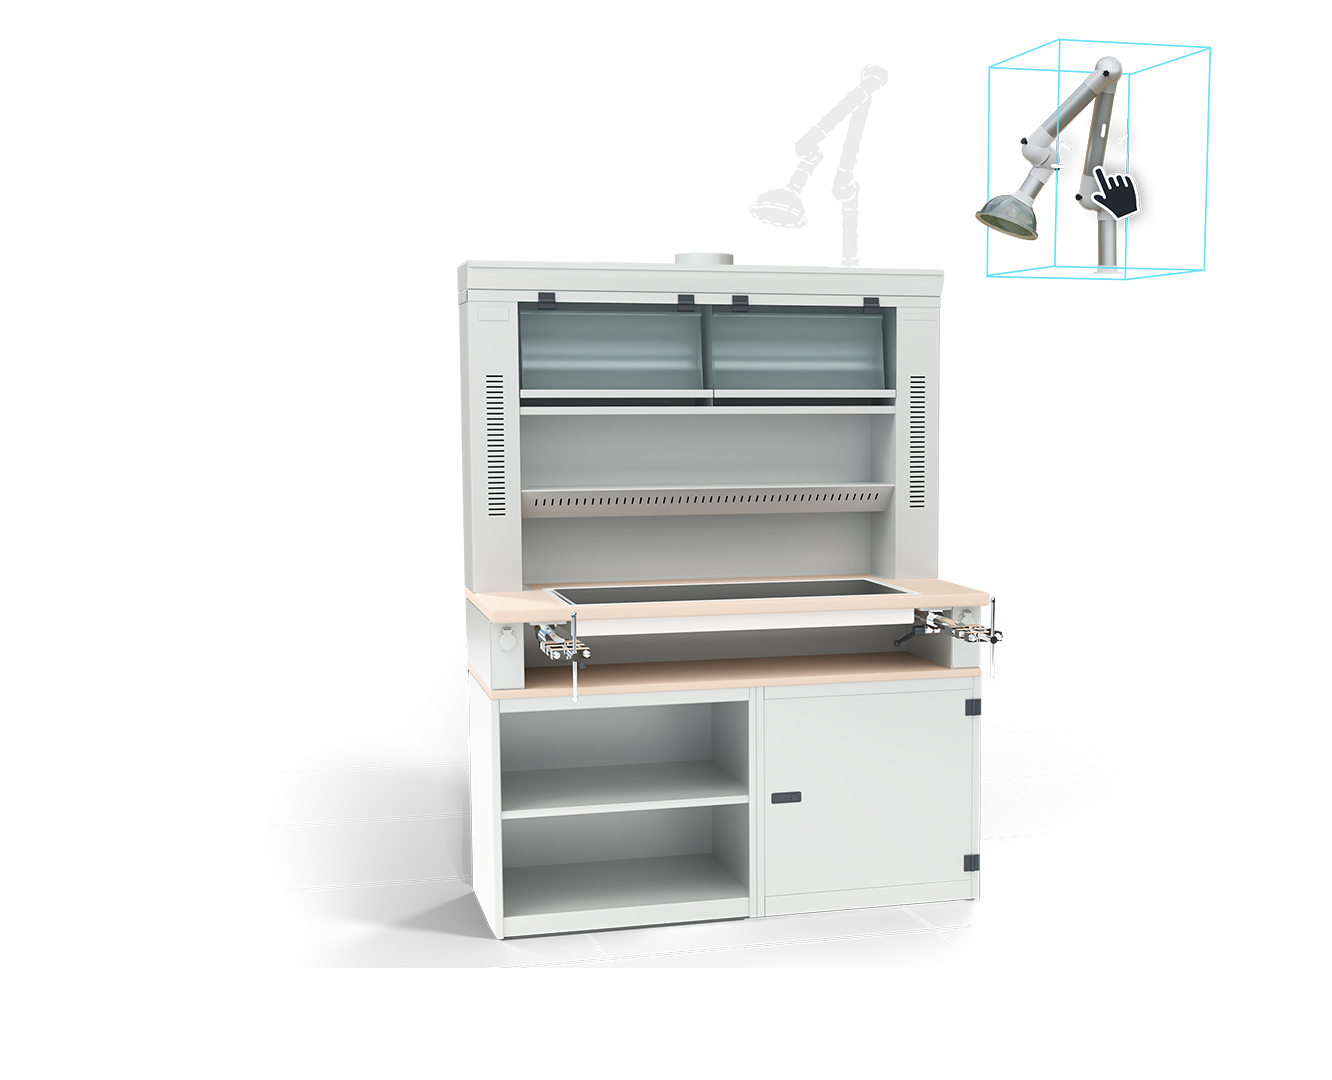
To make furnishing easier, products that are typically used together are already offered as a single combined item. However, there are also optional add-ons that can be combined with multiple products—such as extraction arms. These can easily be connected to a compatible product using predefined connection points and drag & drop functionality.
Bring together what belongs together
If you want to create your own product combinations, you can group multiple products together. Grouped products can be moved, rotated, duplicated, and deleted as one. This saves time, especially if you frequently use the same set of items across different layouts.
Always a clear view
By rotating, panning, and zooming, you can view your setup from any angle. To keep your view unobstructed, exterior walls are dynamically hidden when they block the camera. Interior walls gradually fade depending on distance. This ensures you always have a clear view of your layout while maintaining spatial orientation.
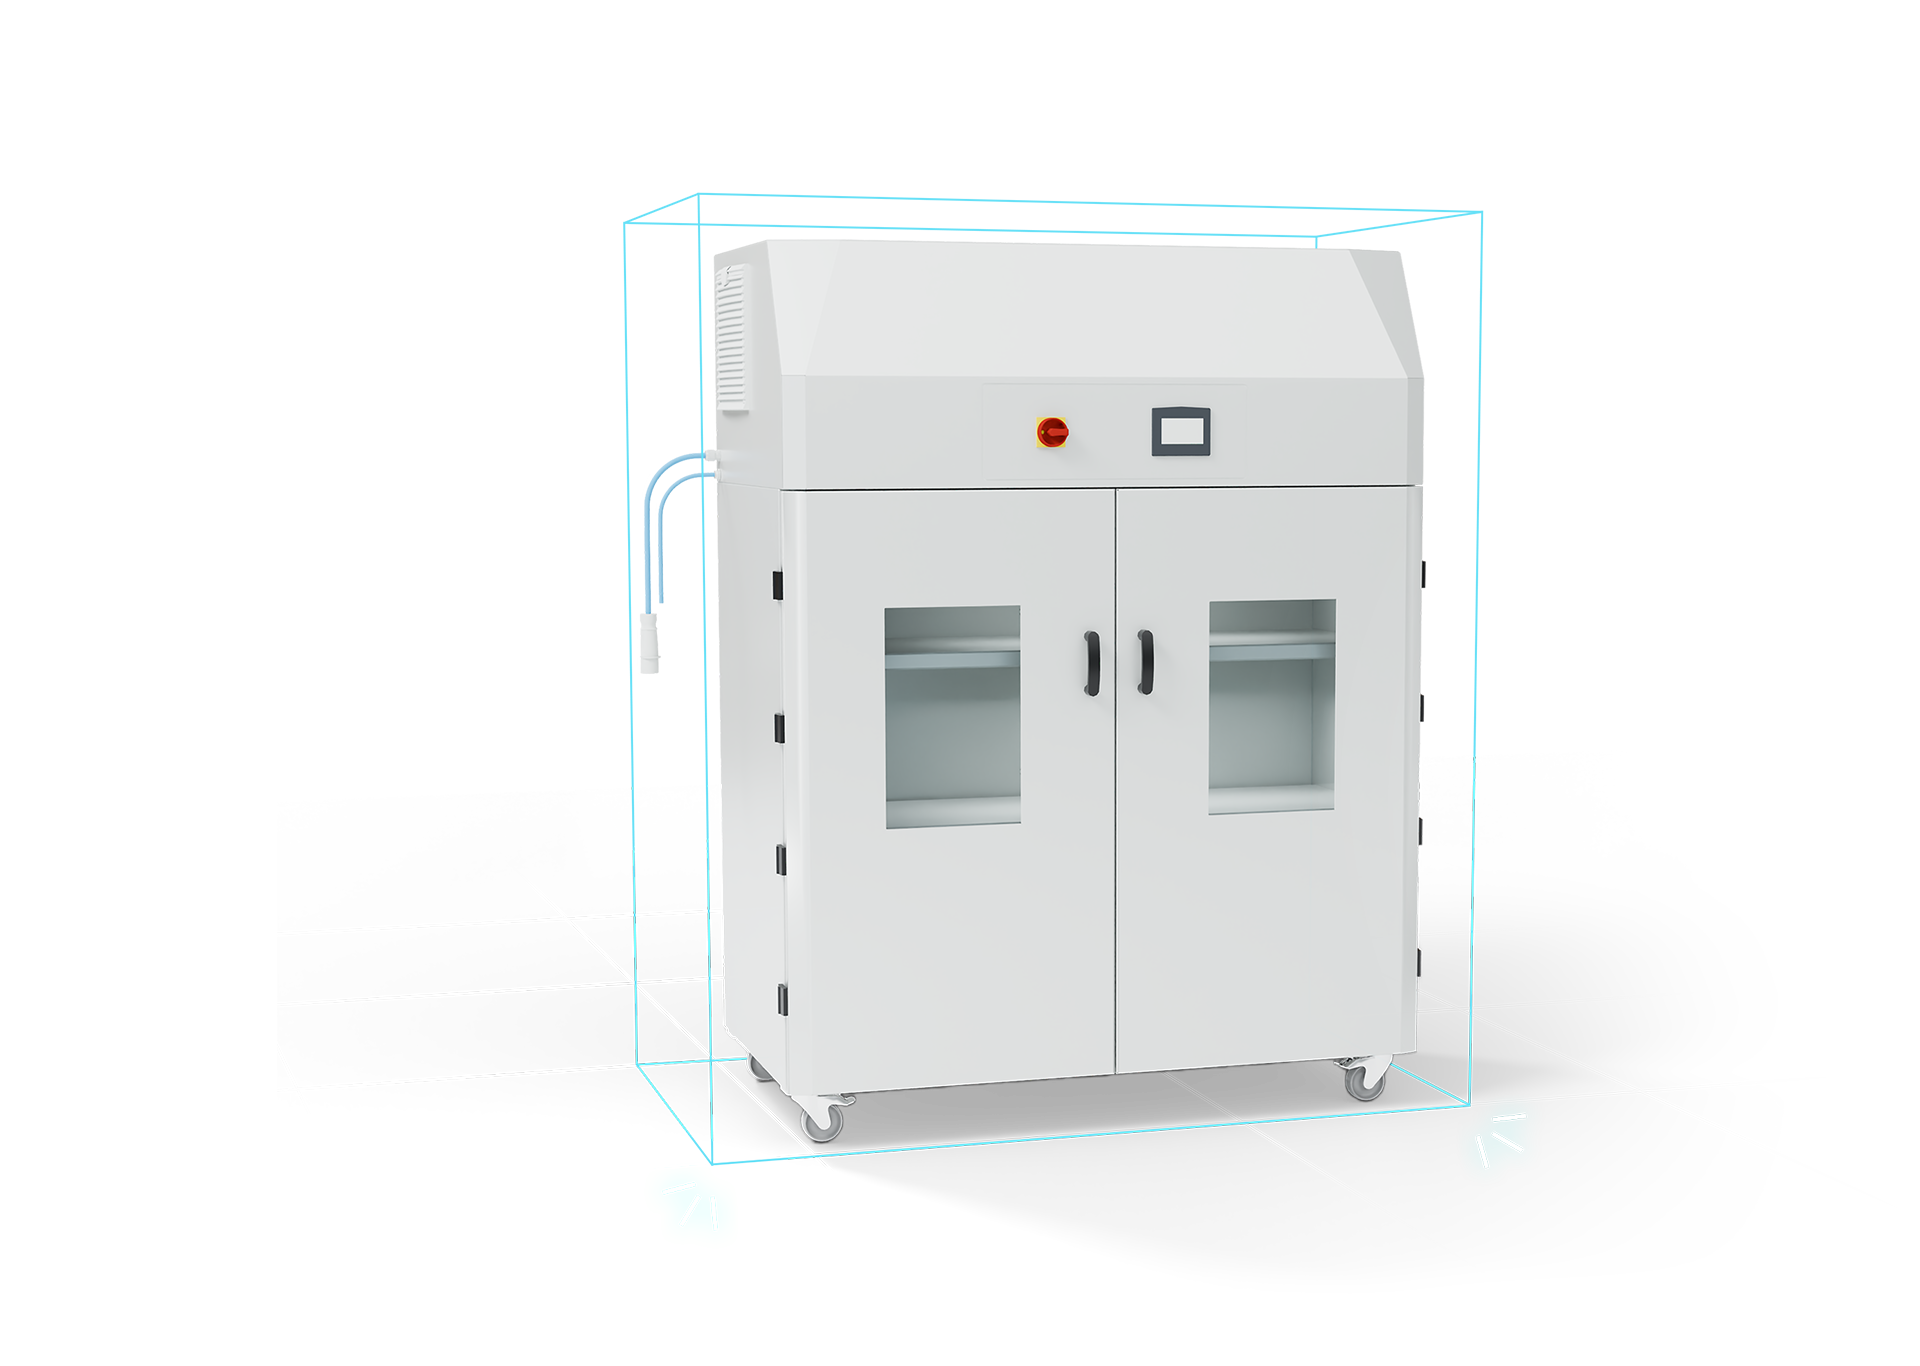
Ottobock machines
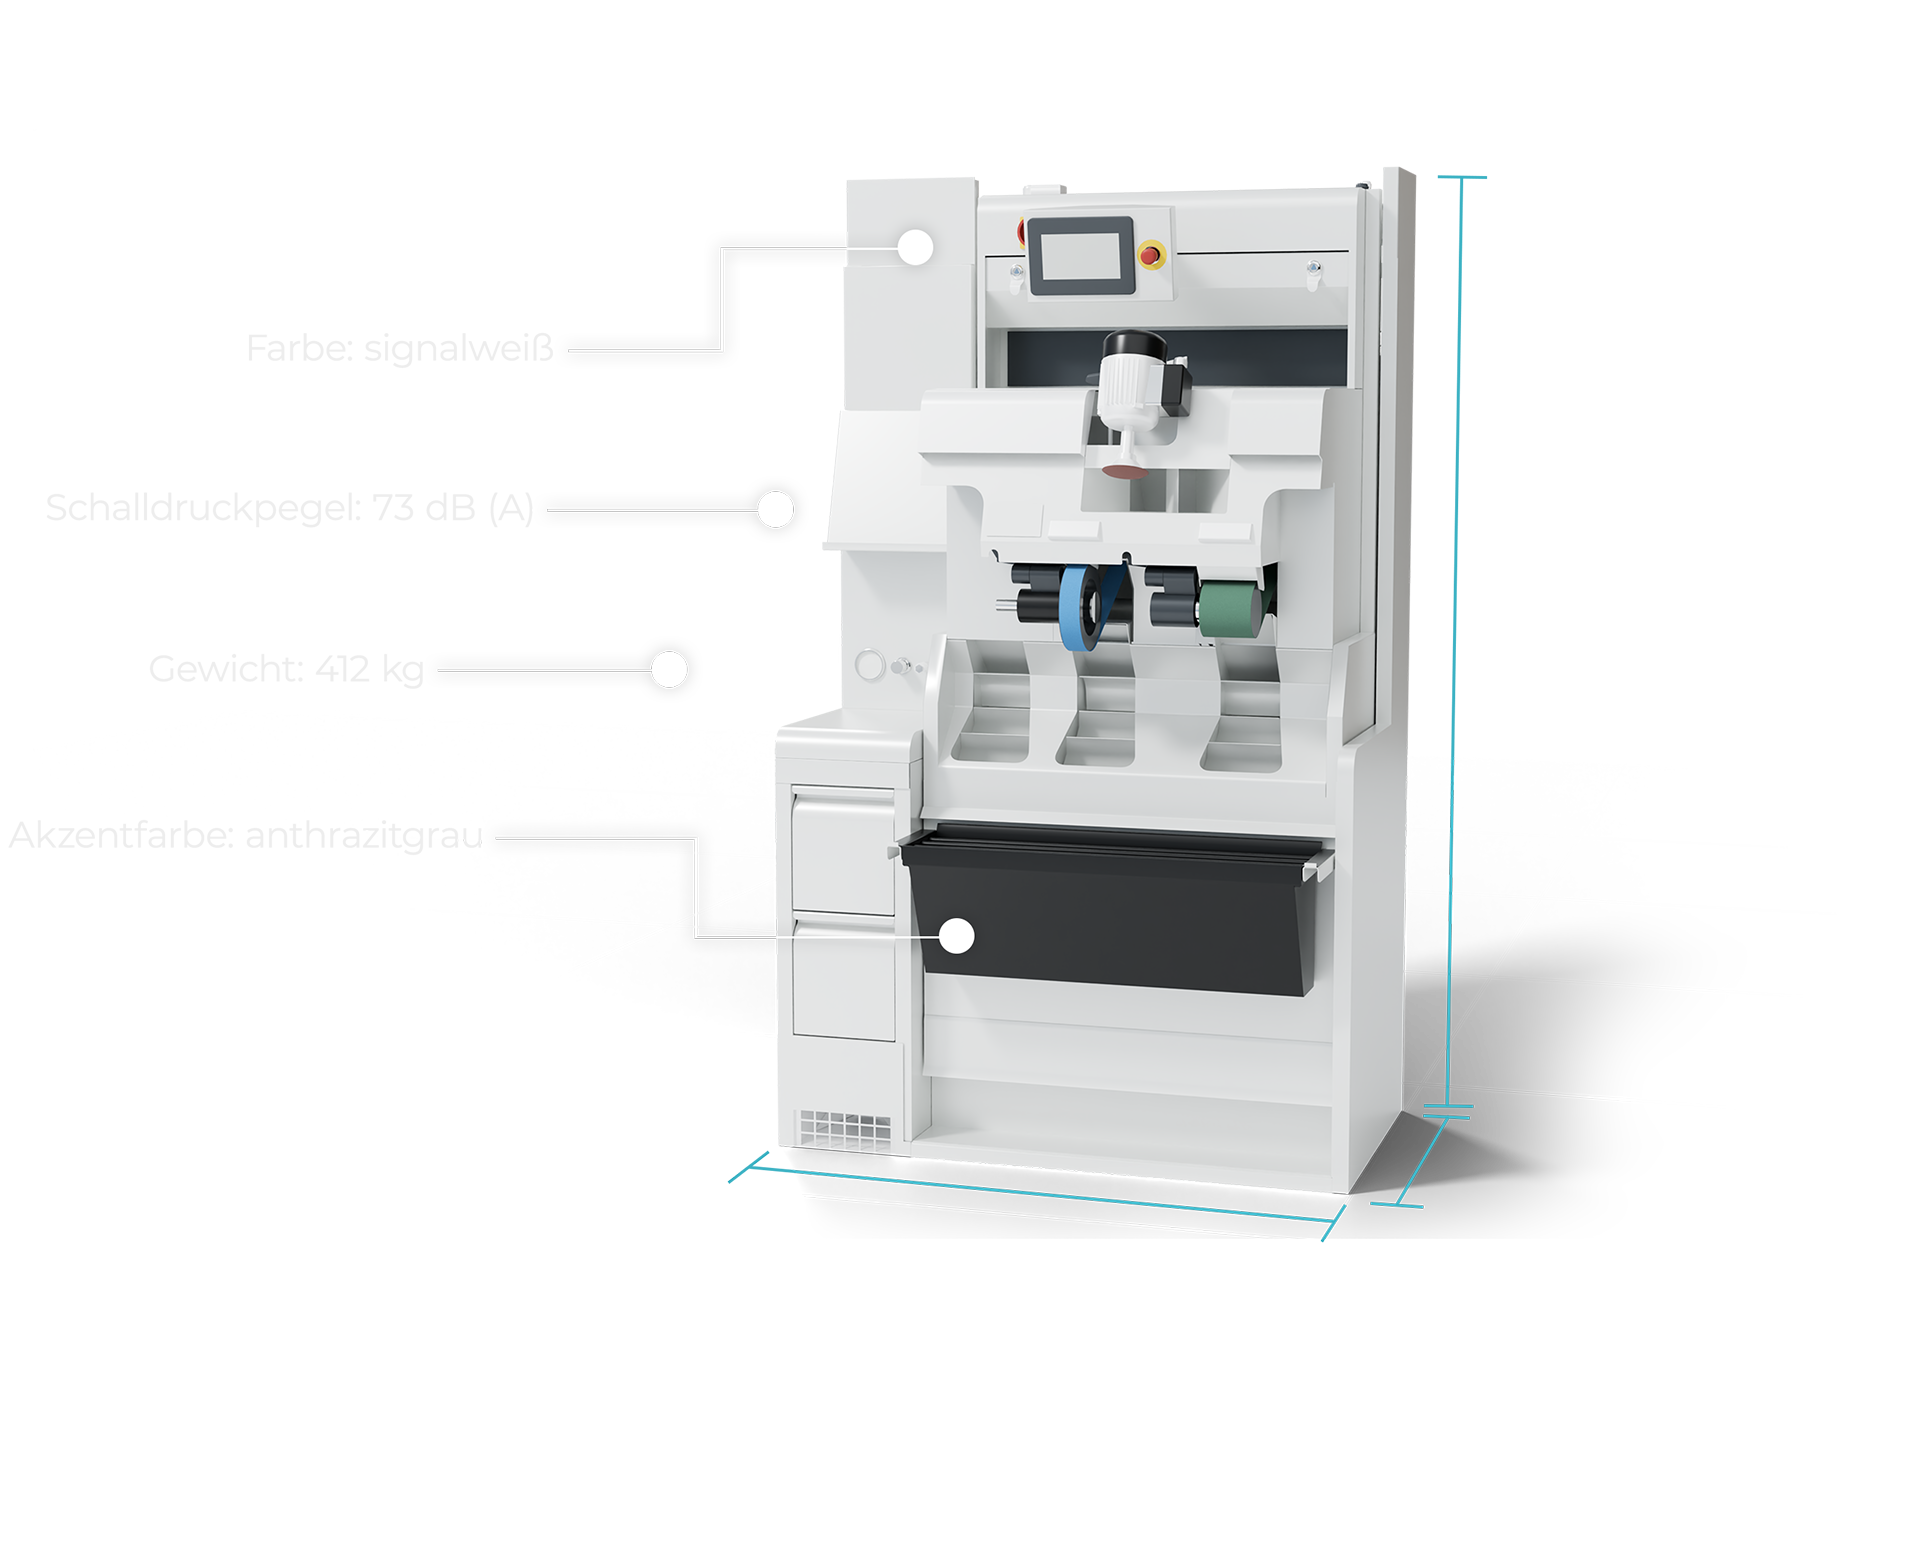
For Ottobock’s in-house machines, additional technical specifications are available beyond the general product information. These include a brief product description as well as all relevant technical data—from precise dimensions to individual parameters. For some products, a short informational video and an AR model are also accessible.
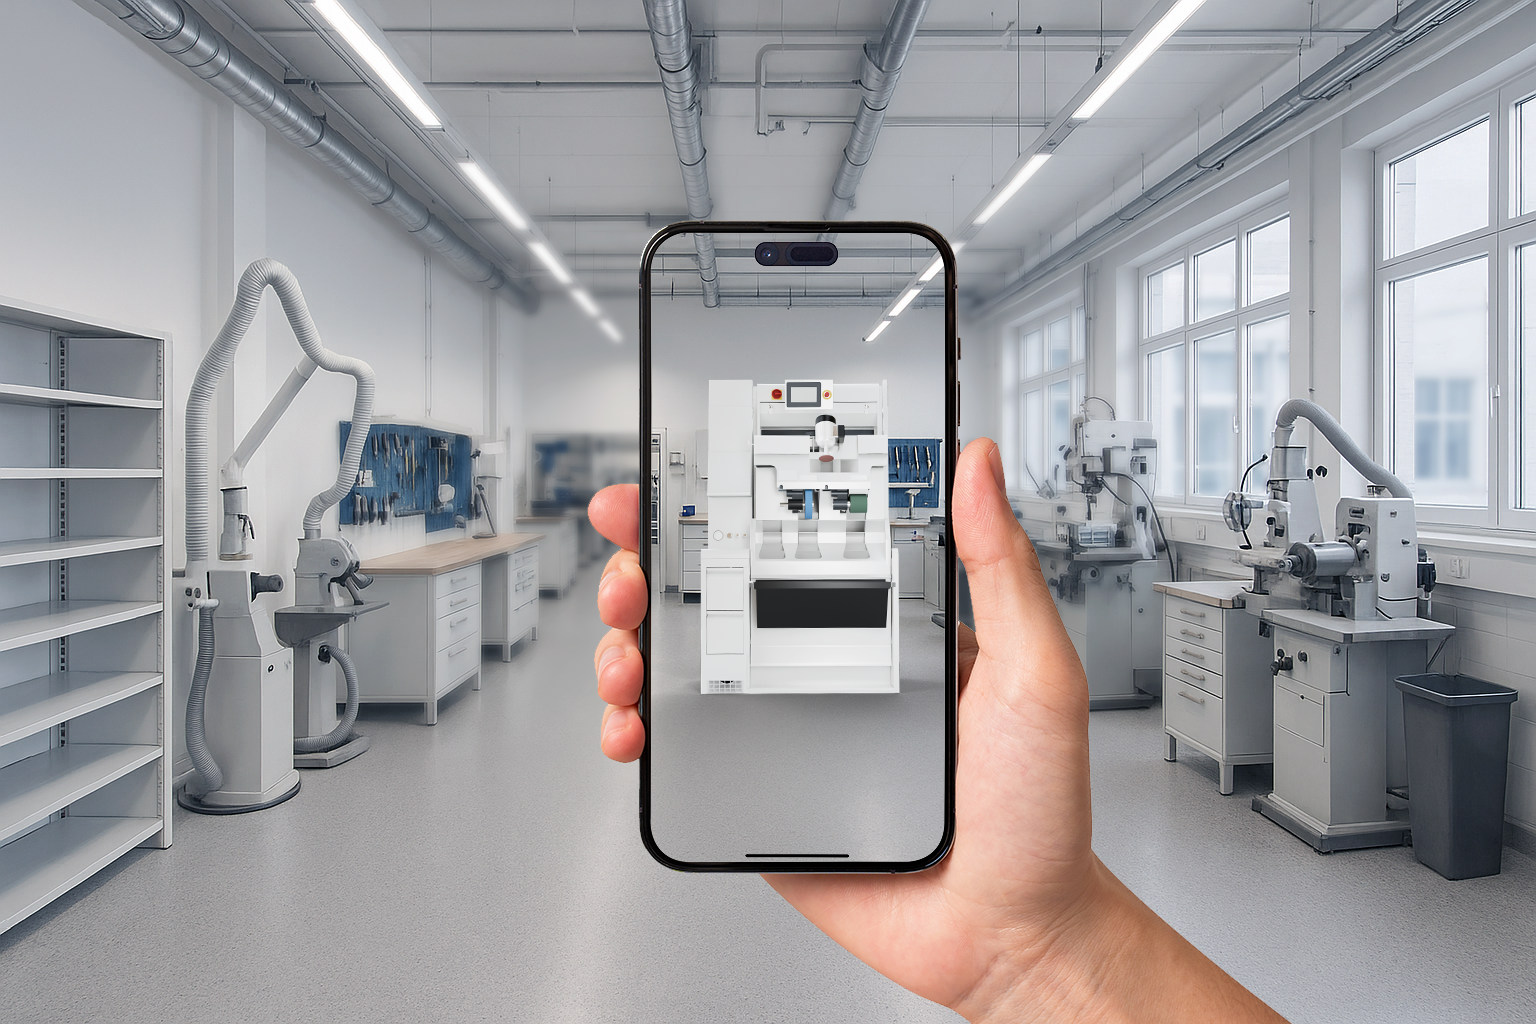
AR view
While it’s easy to imagine a chair or table in a given space, Ottobock machines can be harder to visualize. That’s why all Ottobock machines include an AR model that can be opened directly within the 3D Planner. Each machine can thus be projected into the real environment at its true-to-scale size and viewed in 360 degrees. All that’s required is a device equipped with a camera and native AR functionality.
Single Sign-On
Thanks to integration with the Ottobock Active Directory, Ottobock employees can conveniently log in to the 3D Planner using their existing credentials. Role-based permissions ensure that each user sees only the functions relevant to them — from simple planning access to viewing product prices and calculating the total cost of a workshop layout.
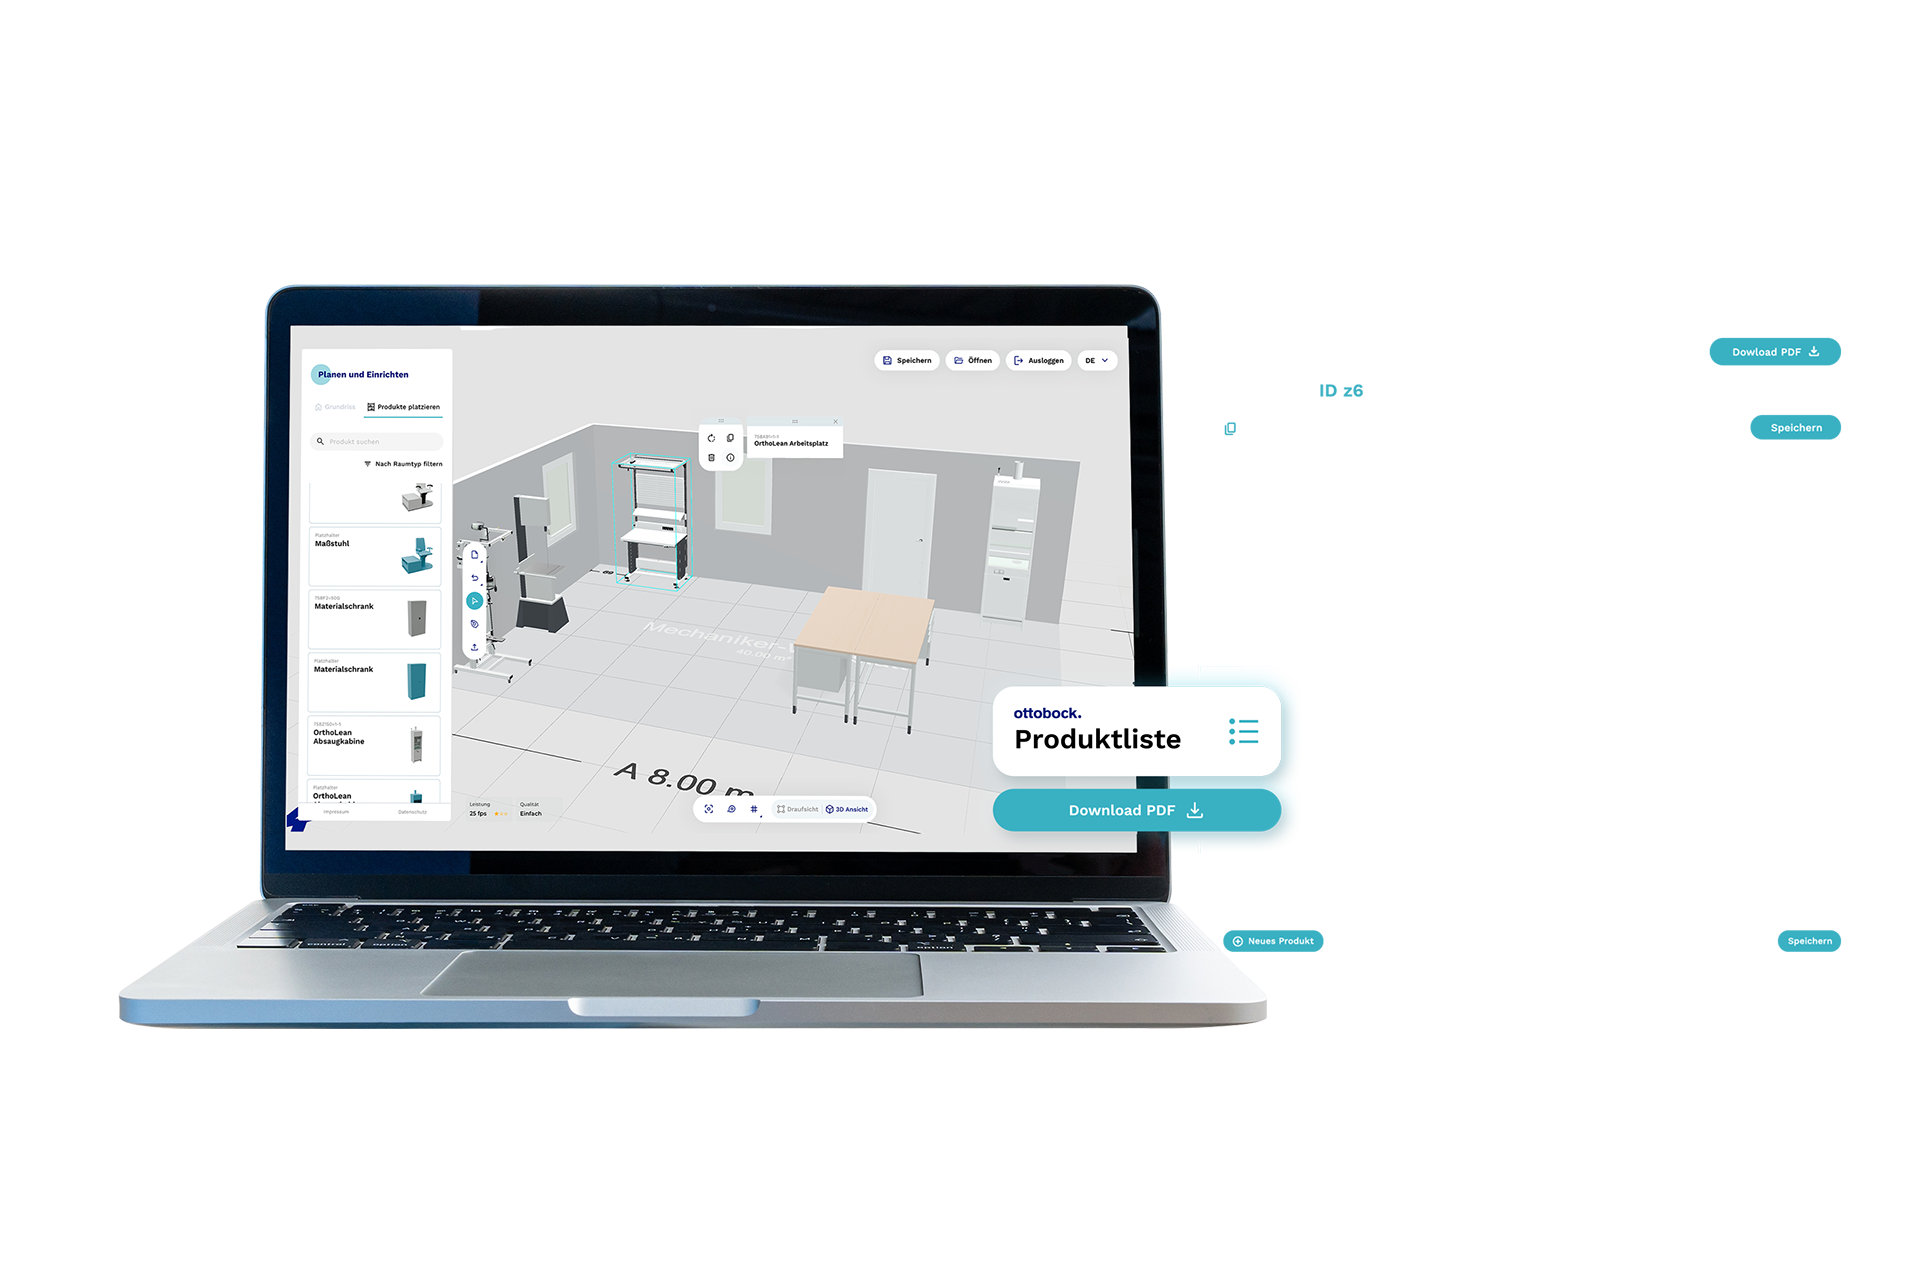
All products in one overview
While you intuitively design your workshop, an exact bill of materials is automatically generated in the background. Every product is assigned to the rooms you created and listed with its item number, name, and quantity.
If you are logged in as an administrator, both unit and total prices are also displayed. In addition, you can add extra accessories by specifying their item number, name, quantity, and price.
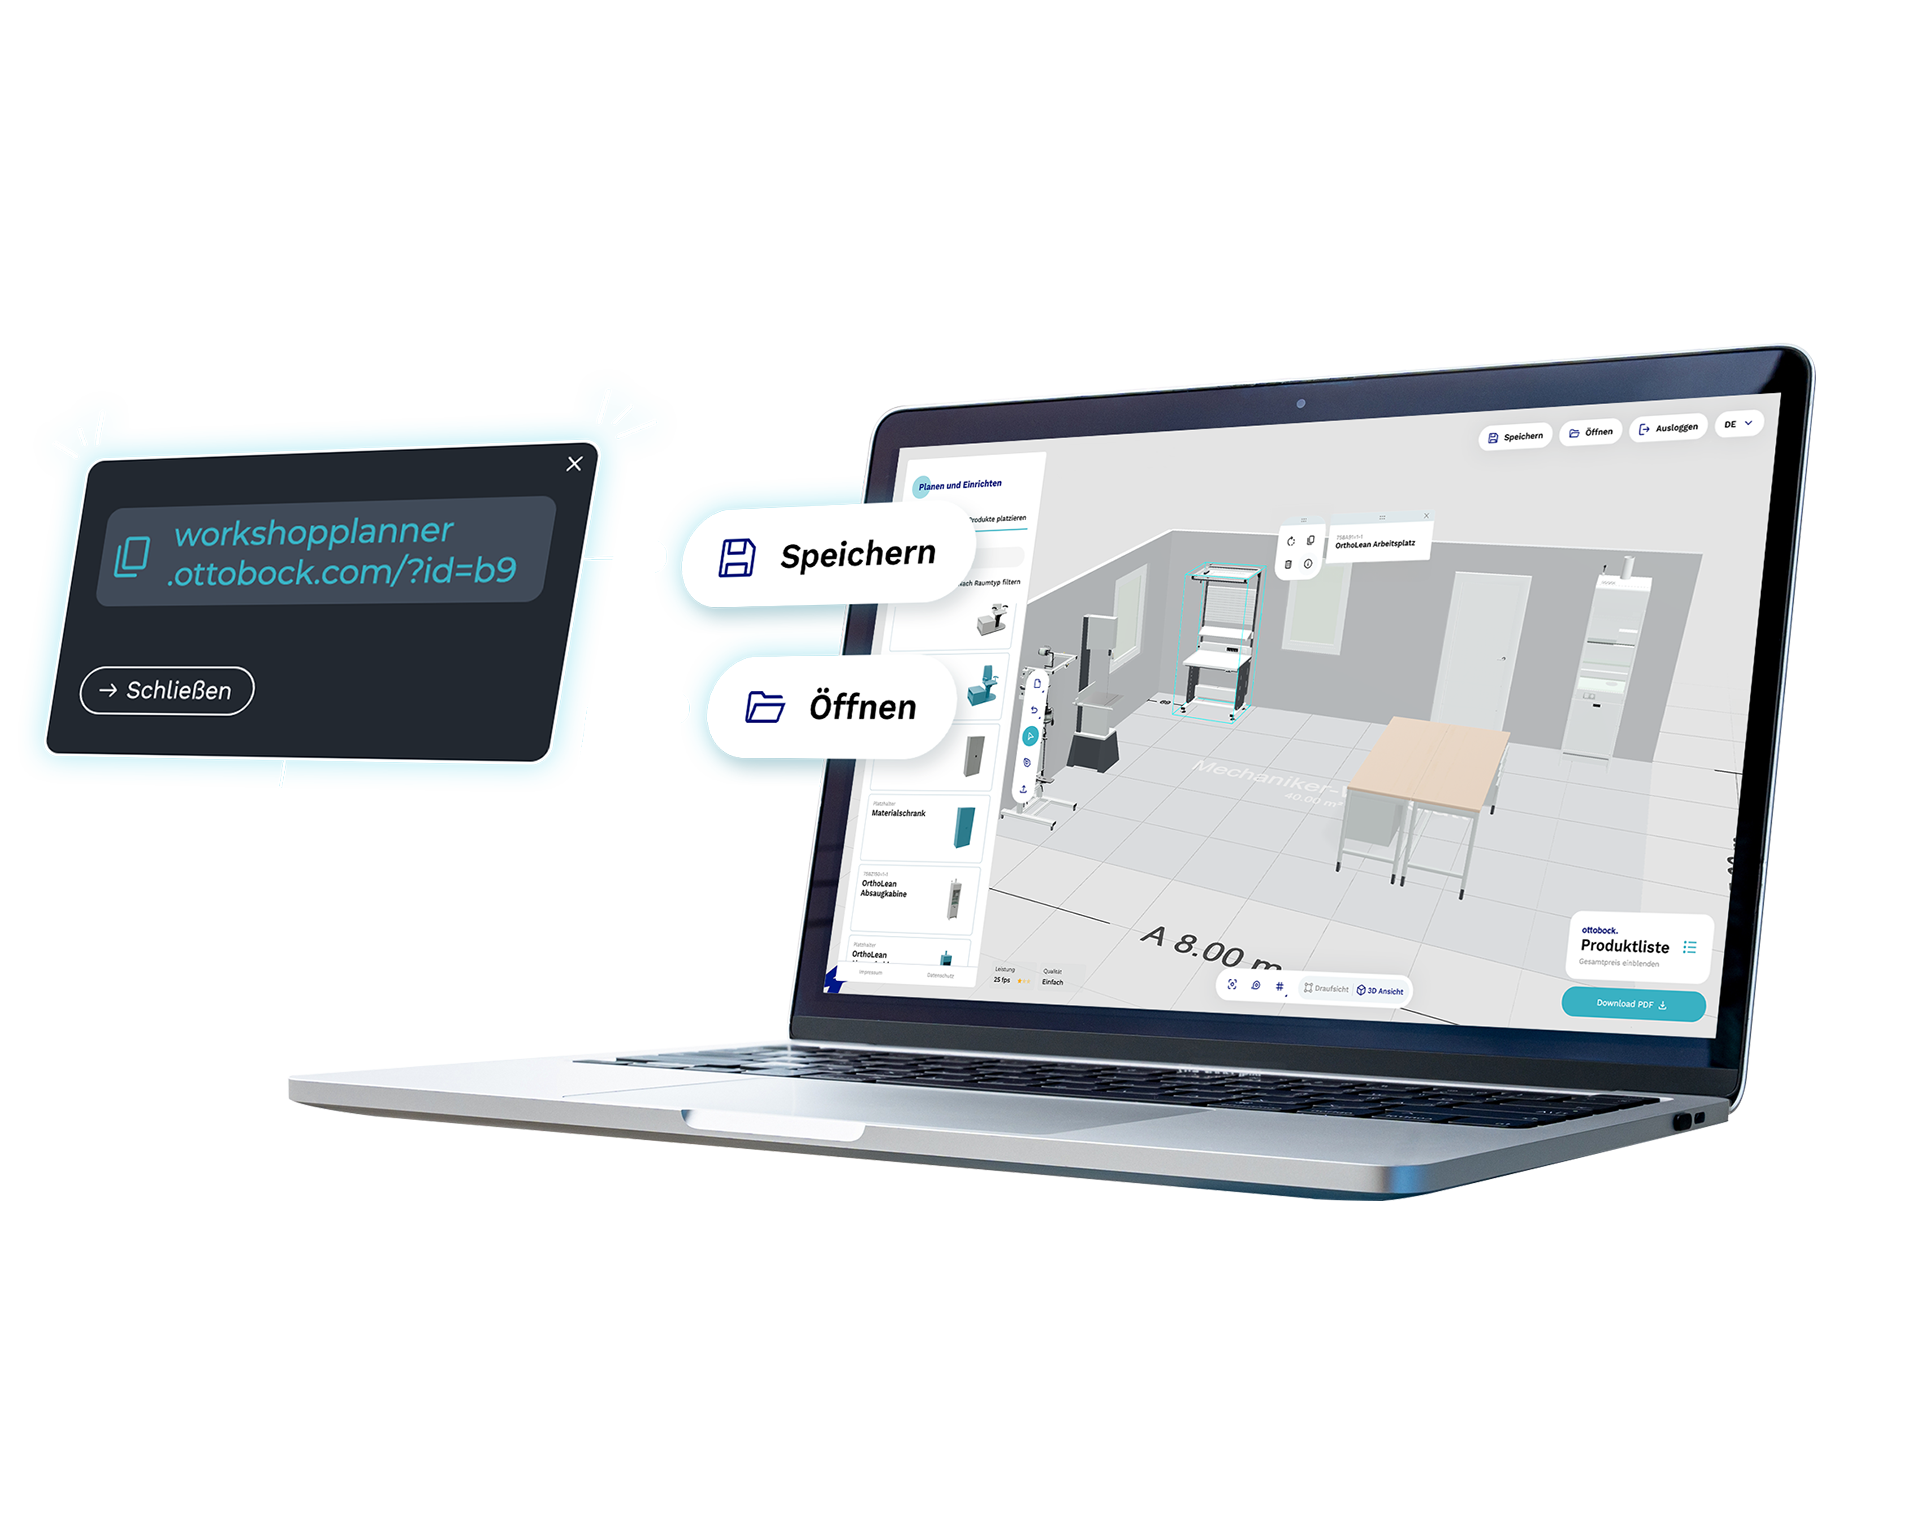
Save & continue later
You can save your planning at any time to share it with others or continue working on it later. The 3D planner provides you with a unique ID that allows you to reopen your saved configuration whenever you need.
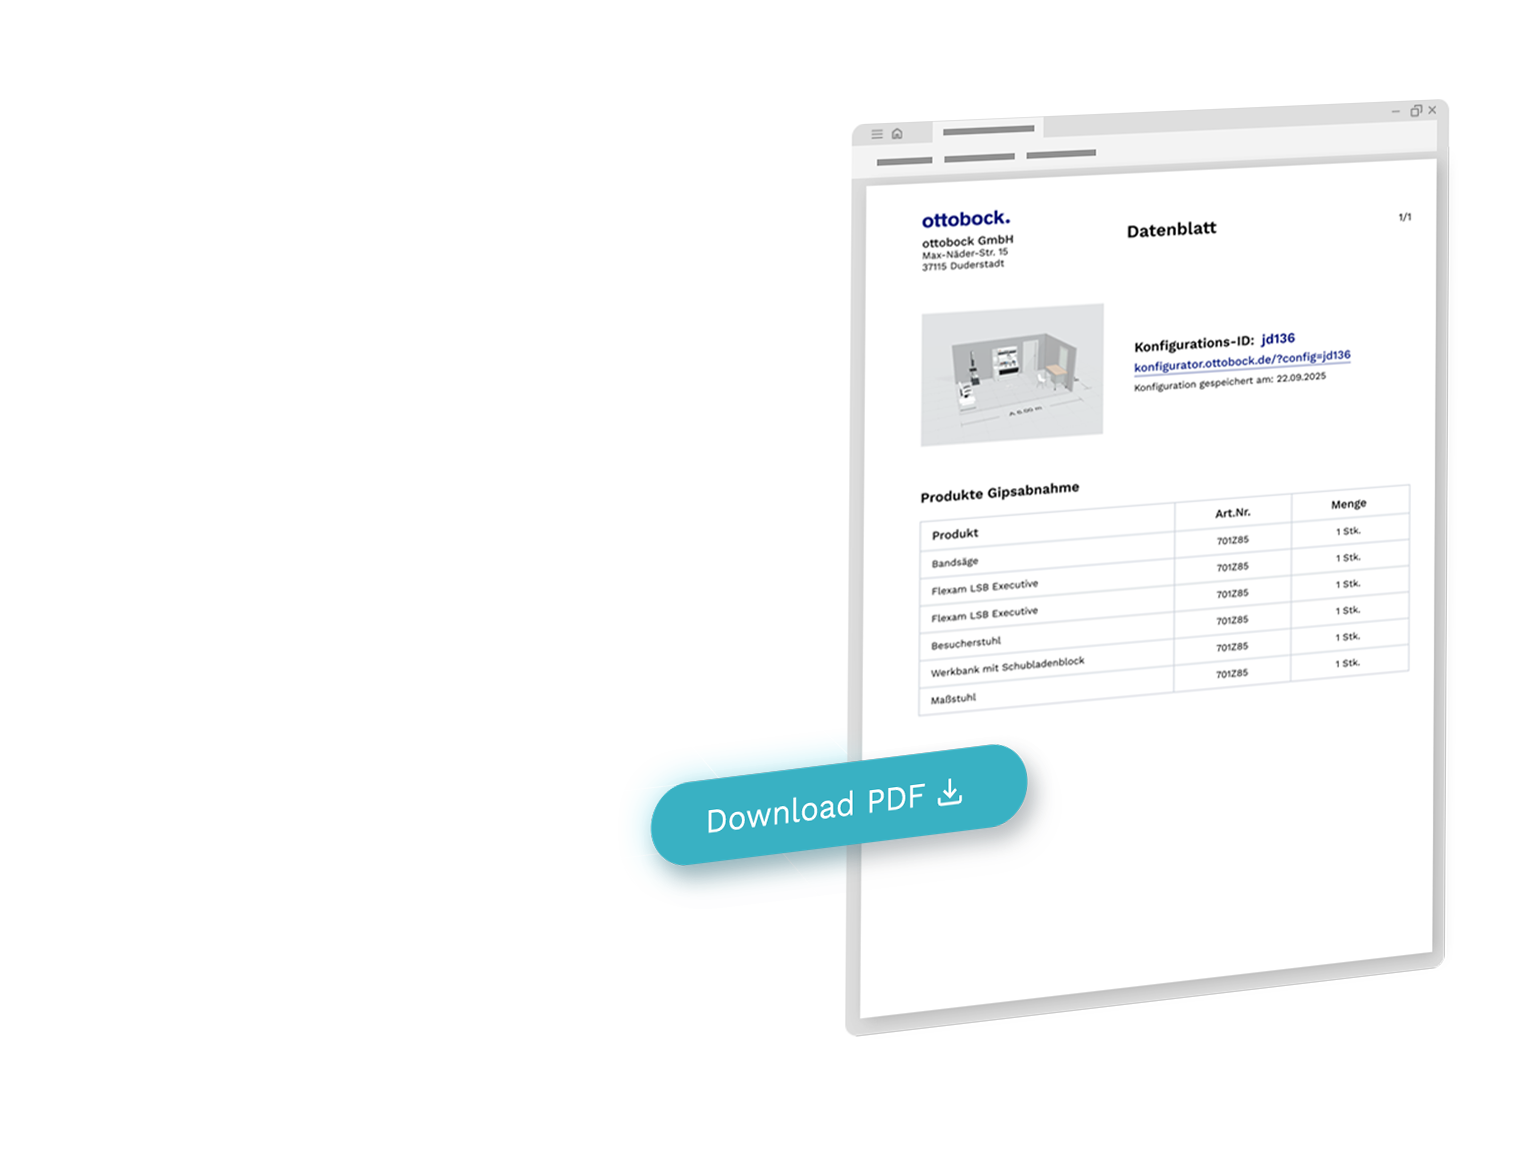
On paper
You can also generate a data sheet of your current project as a PDF and download it. In addition to a tabular view of the bill of materials, the PDF includes further details such as the unique ID, a link to the plan, and an image of the layout — giving you all key information about your project in one document.

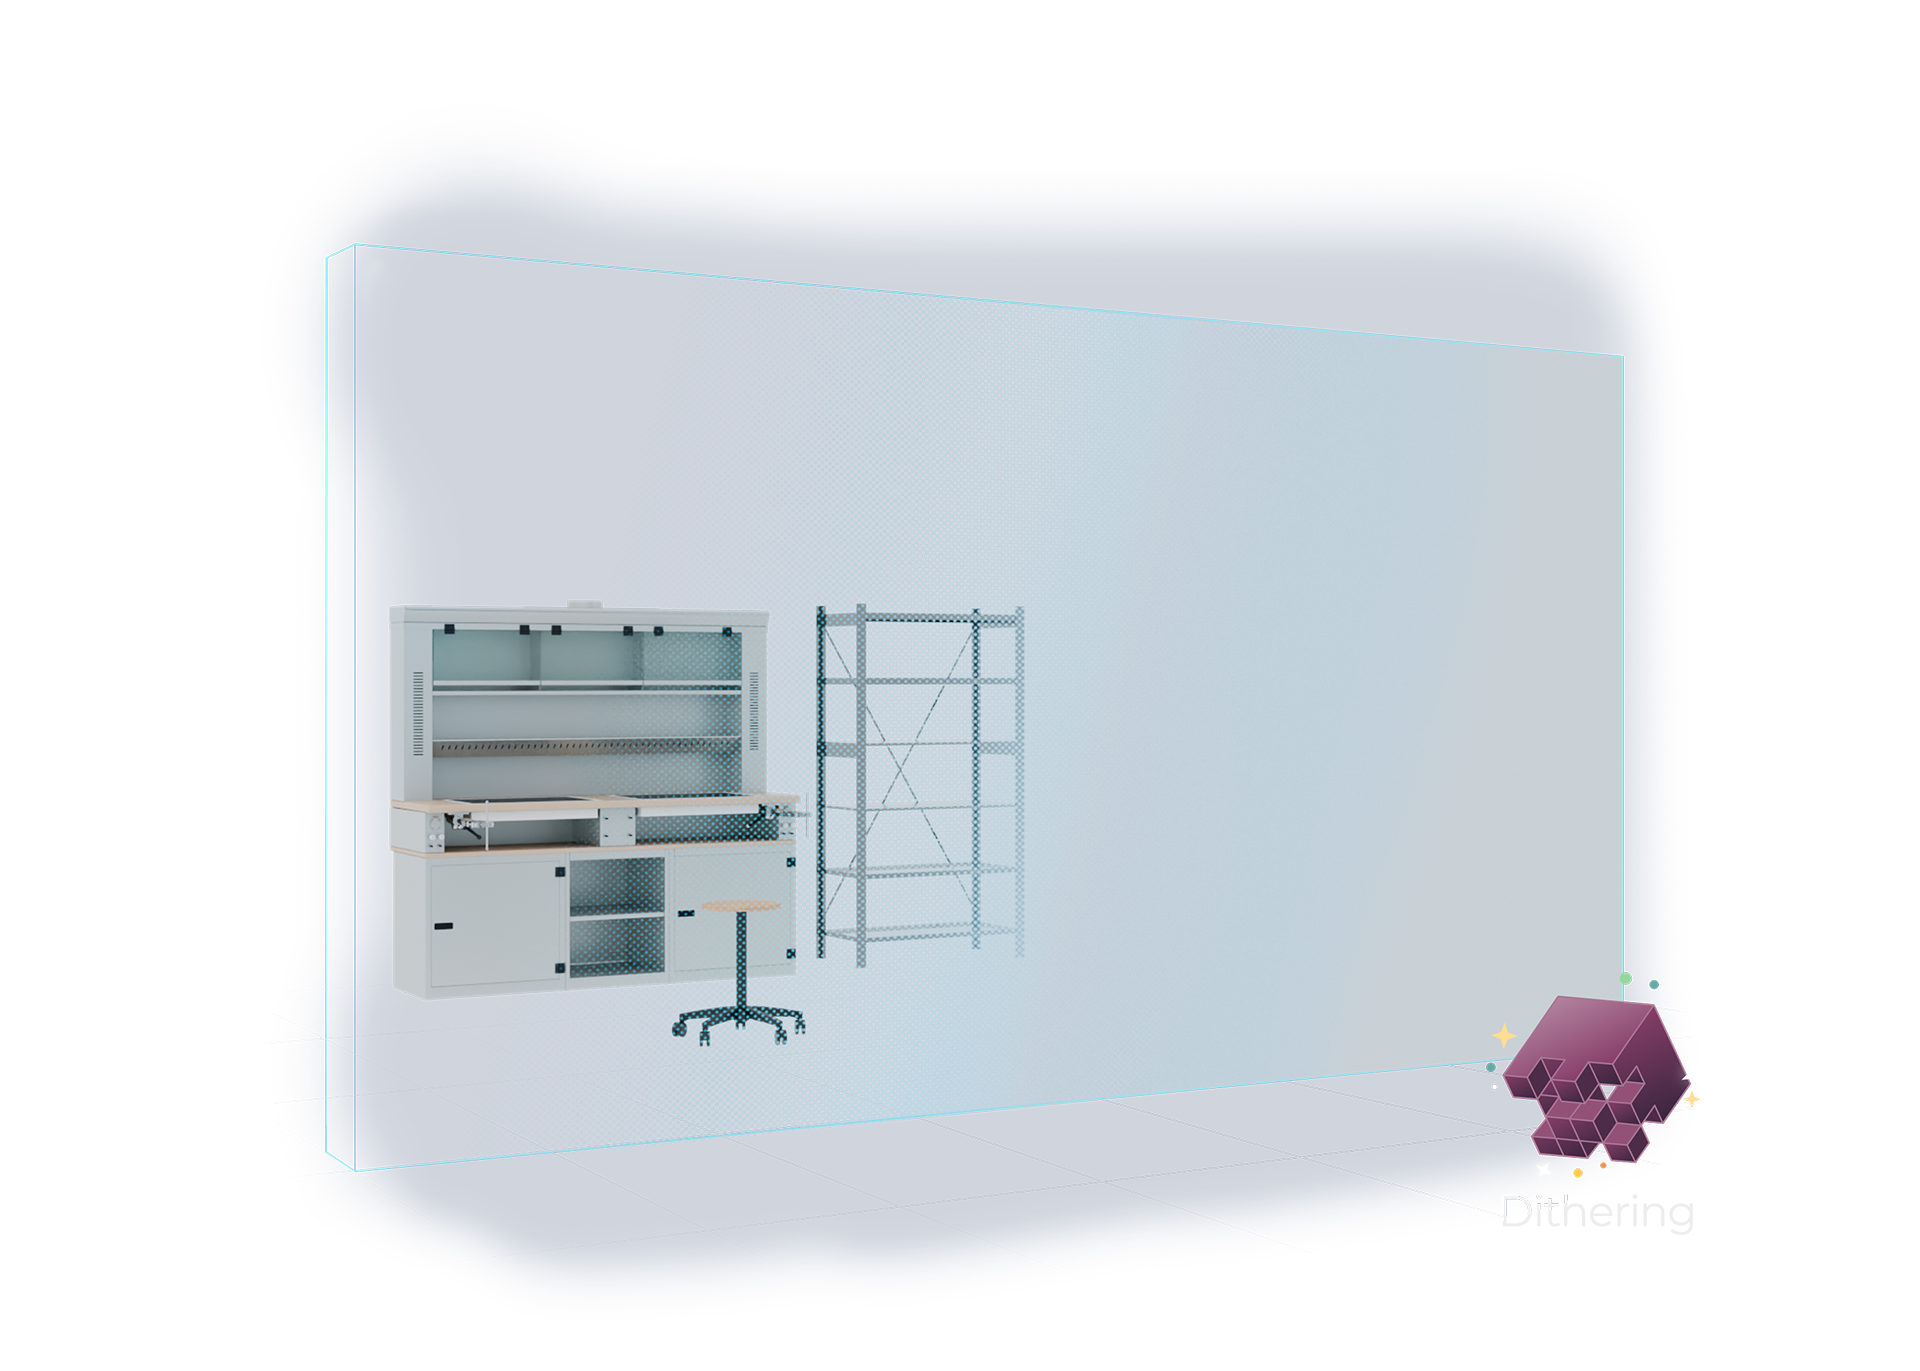
Wall Dithering
To ensure that walls don’t obstruct your view of the layout, the 3D Planner uses a special shader for interior walls in addition to dynamically hiding exterior ones. When the distance between the viewer and a wall falls below a certain threshold, the shader gradually fades the interior walls using a dithering effect. Based on the current camera position, each pixel is individually calculated to determine whether it should still be rendered or not. The result is an appealing, semi-transparent visual effect that maintains spatial clarity without distraction.
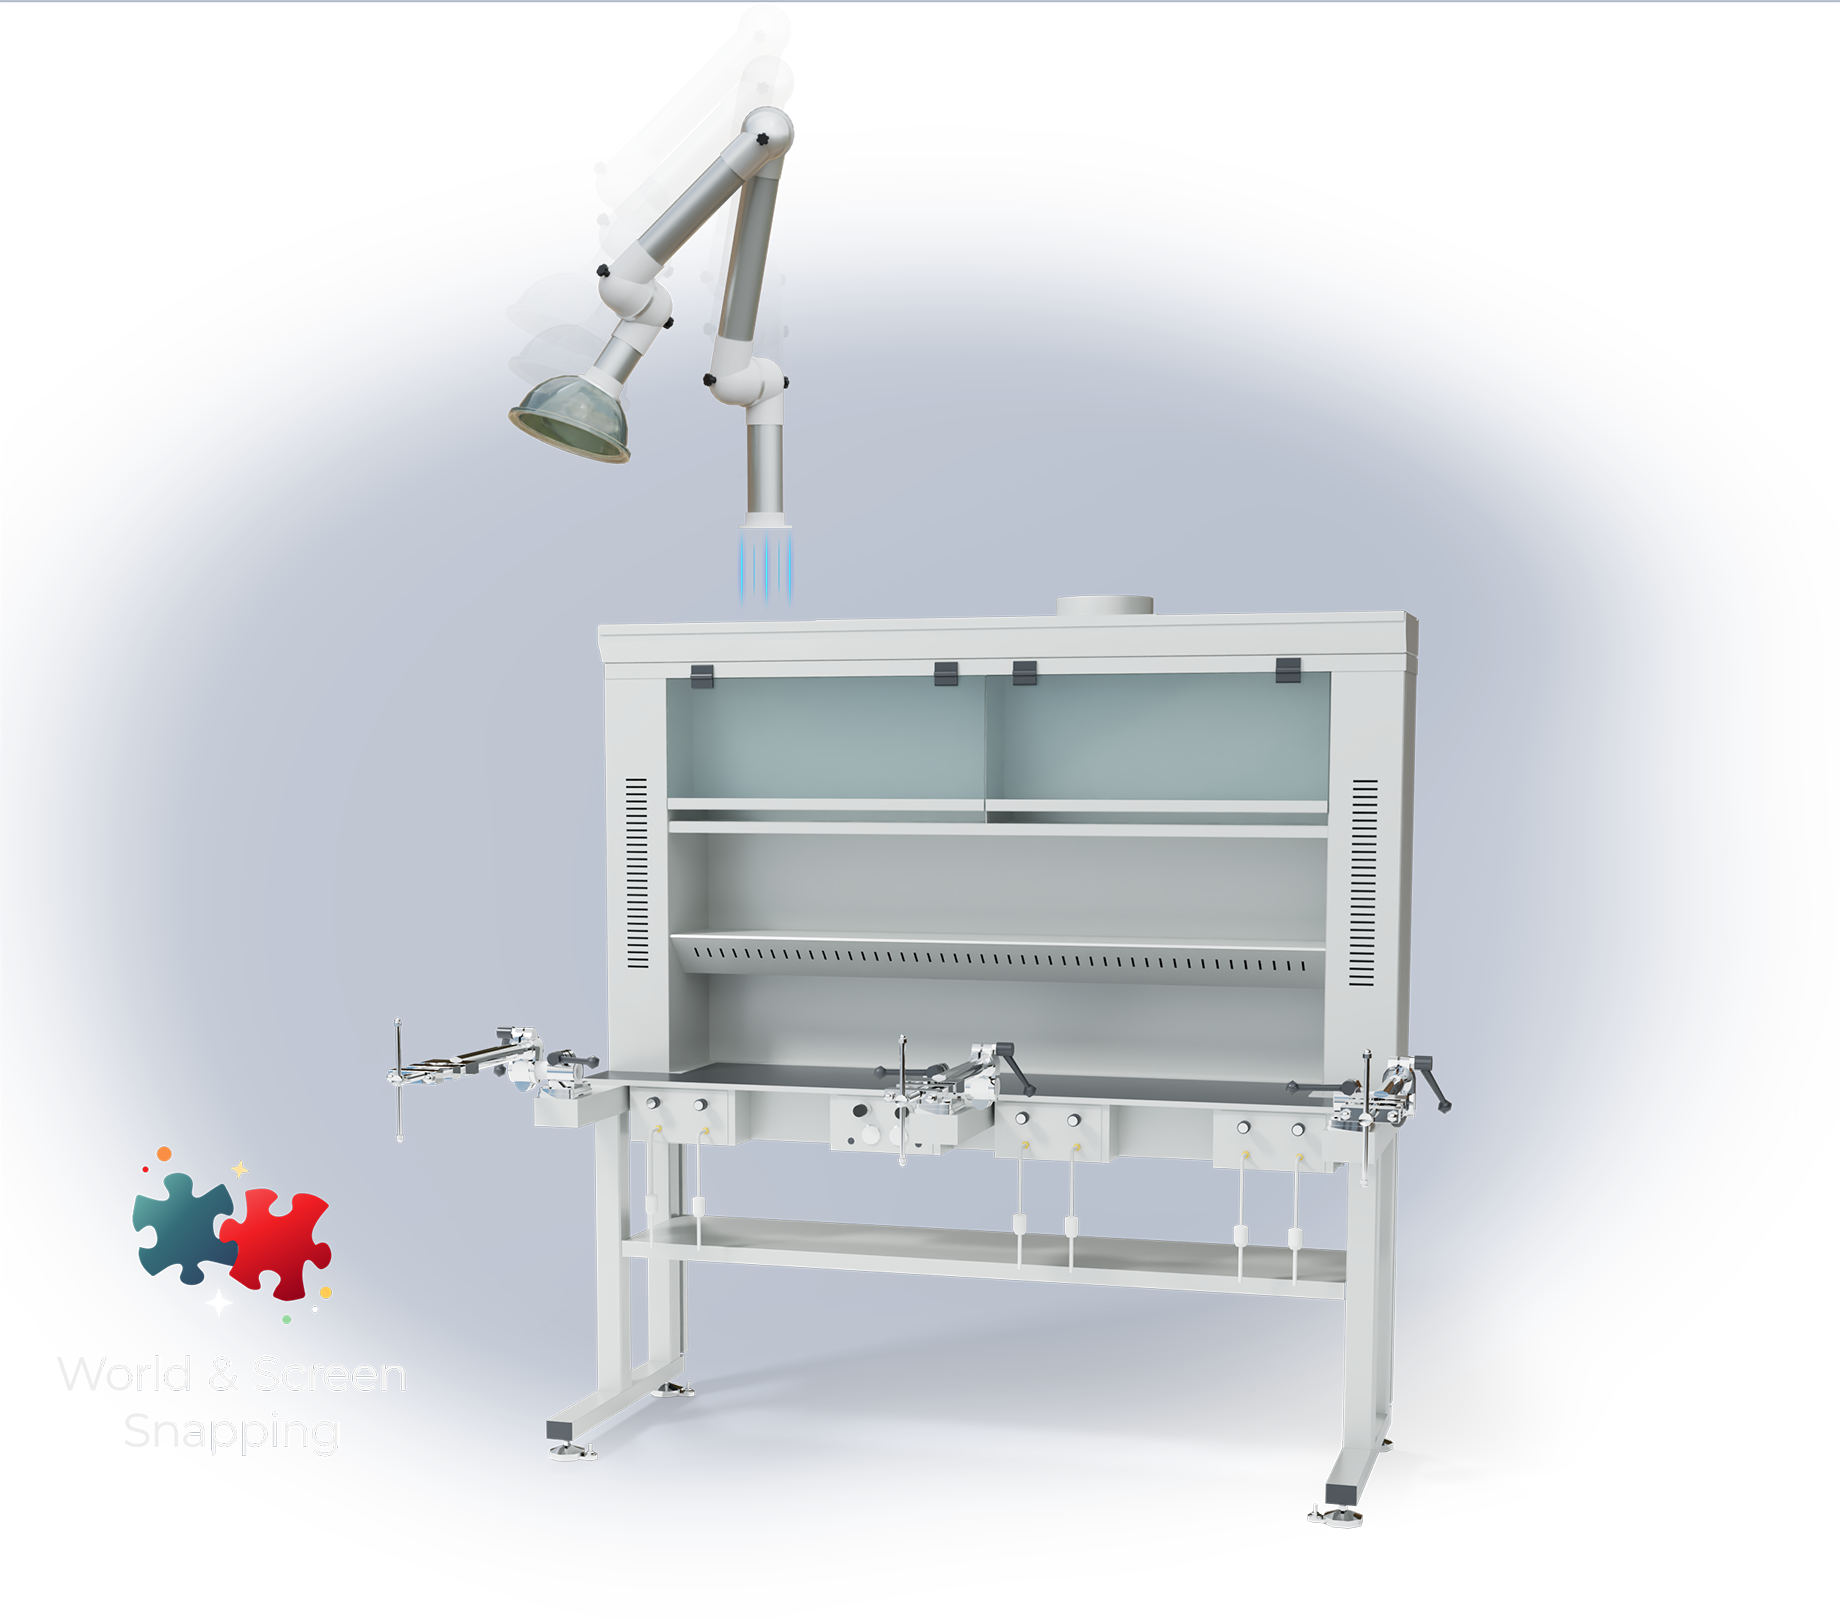
World & Screen
To make product placement in the 3D space as intuitive as possible, the Planner employs two snapping methods. On one hand, objects are positioned relative to each other when they fall within a defined distance in the virtual 3D space. On the other hand, products that are still outside this distance but visually aligned on screen can also be placed precisely using screenspace snapping, which calculates distances based on the cursor position on the screen rather than within the 3D environment.
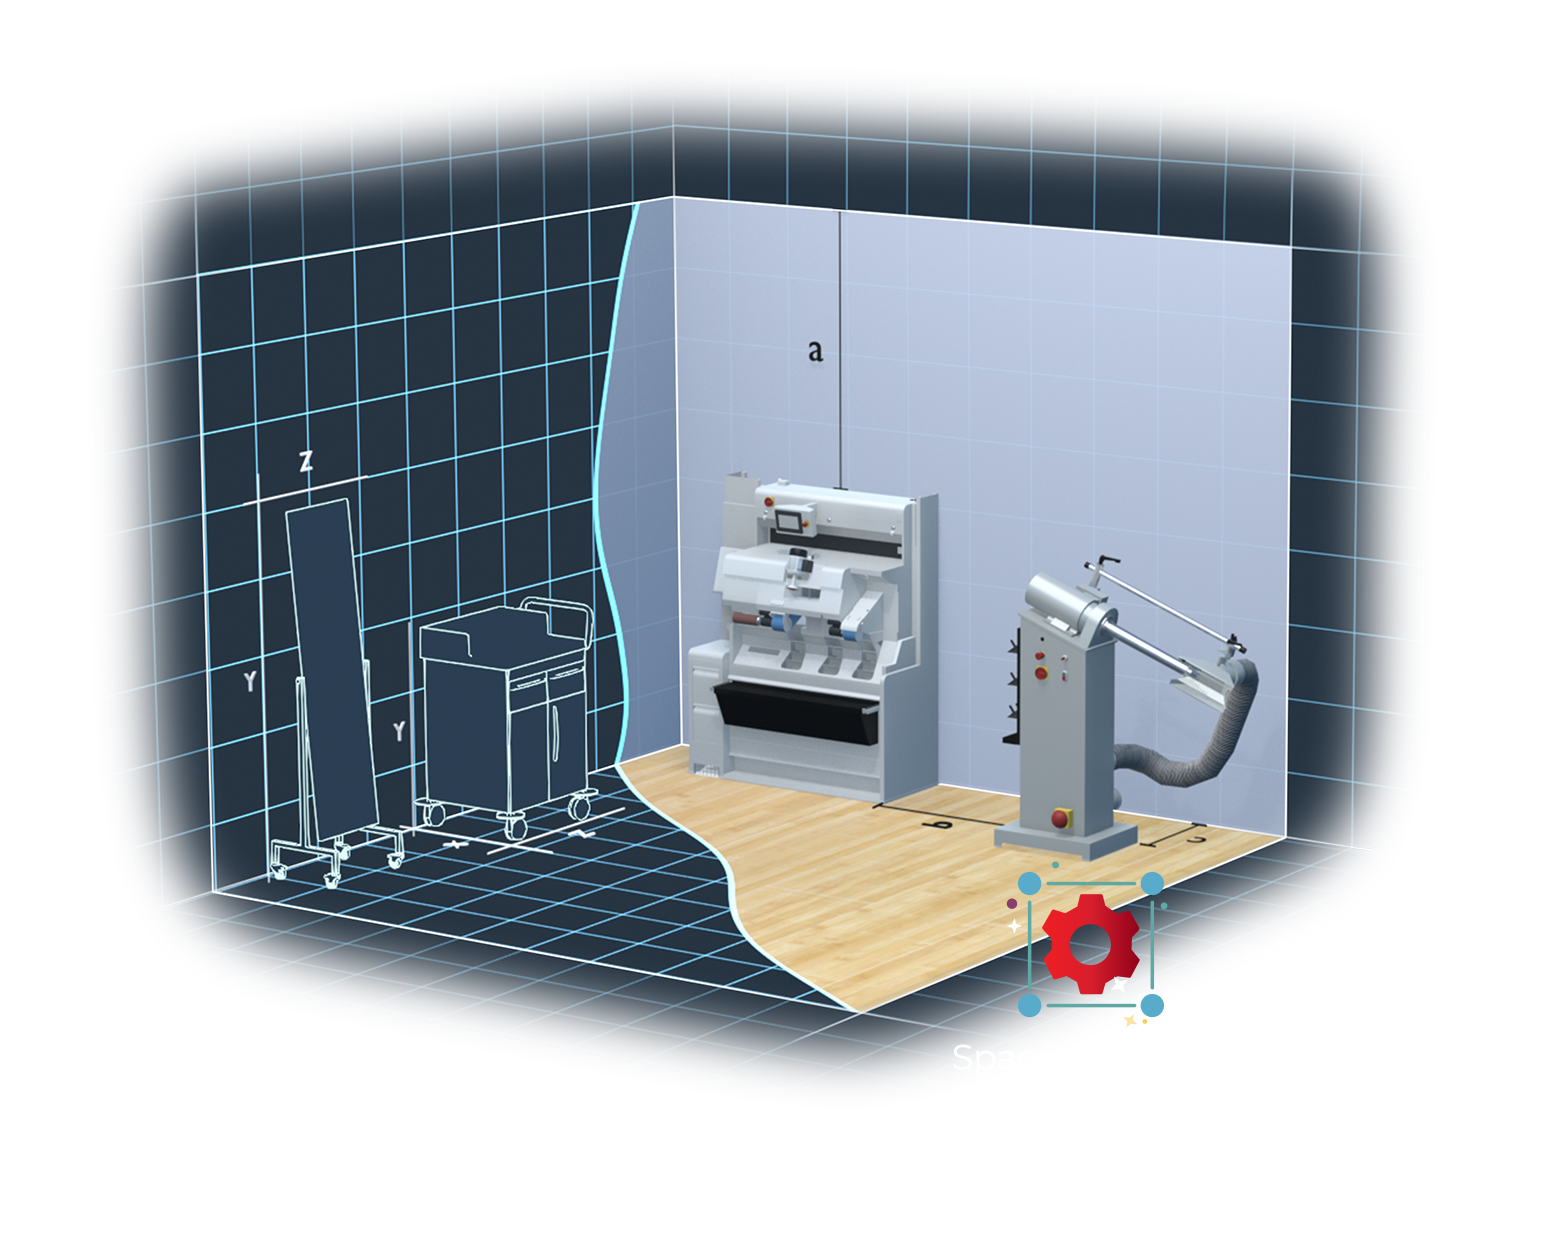
Space Planning Framework
The Ottobock 3D Planner is built upon our modular framework redSpaces, specifically developed for virtual space planning. It enables intuitive placement and manipulation of products within a designed environment and provides essential features such as collision detection, snapping, and automatic room recognition. The data structure allows local manipulation of individual rooms without updating the entire hierarchy while maintaining full data persistence.
Features
WebGL
The 3D configurator was implemented using WebGL and is available in all major web browsers.
Responsive Design
The 3D Configurator is accessible across smartphones, tablets, and desktop devices.
Individual ID
Each configuration is assigned a unique ID and can be recalled at any time.
Real-time Pricing
Prices and all other dynamic parameters are calculated in real time.
Validation
If it can be configured, it can be produced — the configurator only allows valid configurations.
Performance
To minimize draw calls, all meshes are instantiated.
PDF Generation
Automatic generation of data sheets including extensive information.
Augmented Reality
The 3D Planner includes an integrated AR mode for visualization.
Tools
redCore
At the heart of our 3D applications is redCore, our rendering engine specifically optimized for web-based 3D visualization and product configuration.

redSpaces
Our framework for modular spatial planning — featuring essential functions such as collision detection, snapping, and automatic room recognition.
redCloud
Our cloud service generates different configuration formats on-demand and provides them to the user, for example as an AR model.
redPerformance
Our performance monitoring system tracks graphics utilization and dynamically adjusts the 3D Configurator’s quality settings based on the current device performance.